Scan a Git Repo in an Azure Pipeline with SonarCloud
Saturday, March 11, 2023
Scan a Git Repo in an Azure Pipeline with SonarCloud
#azure-devops #azure-pipelines #git #sonarcloud-analysis #sonarcloud-scan-code
This article is published at GitHub.You can raise issues, create pull requests or even fork the content...its open source.
In this article, you will learn how to scan a Git repo in an Azure Pipeline with SonarCloud.
Prerequisites
The following prerequisites will be required to complete this tutorial:
- Azure DevOps account. If you don't have an Azure DevOps account, create one for free before you begin.
- Azure DevOps project, with a dotnet core project in a Git repository. If you don't have a repo fork the articles Git repo.
- SonarCloud account. If you don't have a SonarCloud account, create one for free with your Azure DevOps account before you begin.
Create a SonarCloud Organization and Link it to Azure DevOps
Create a Personal Access Token
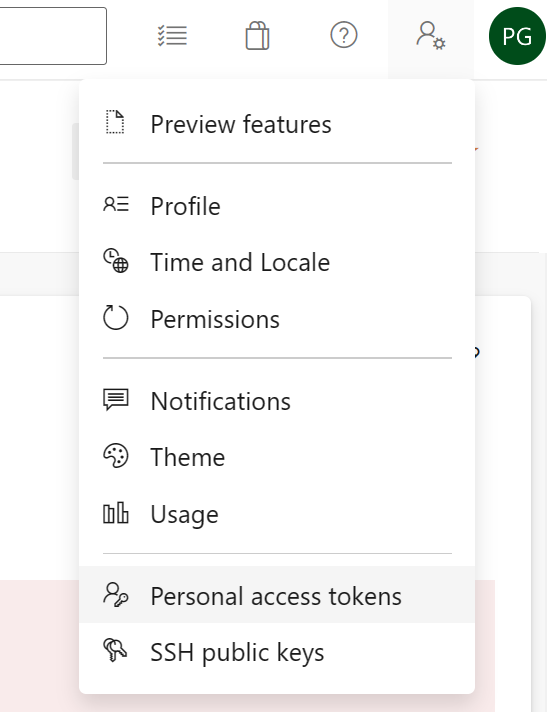
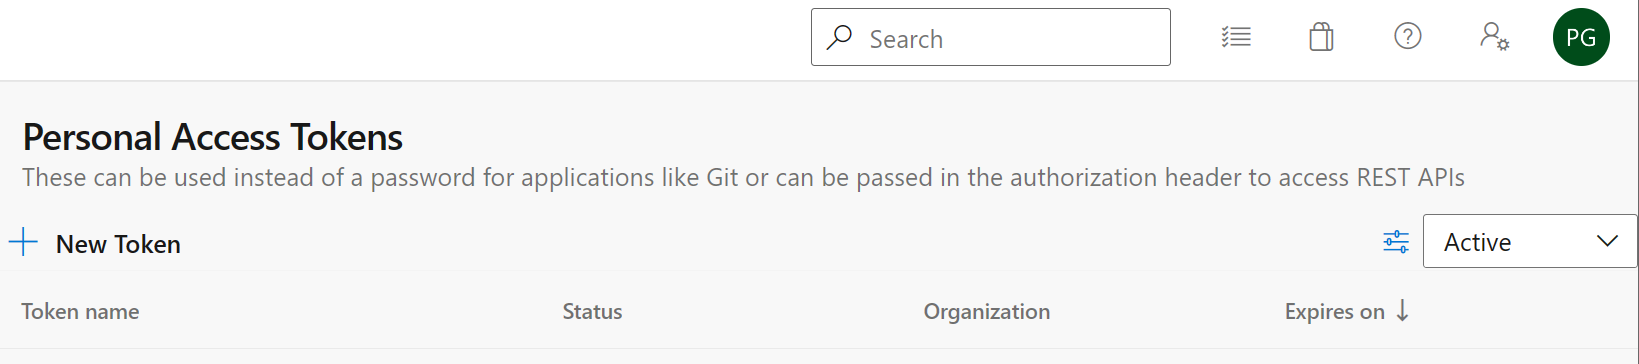
In Azure DevOps, select User Settings, Personal access tokens in the top right of the screen.
Select + New Token.
Enter the following values.
Parameter Value Name SonarCloud Organization Your Organization Scopes Custom defined Code Read & Write 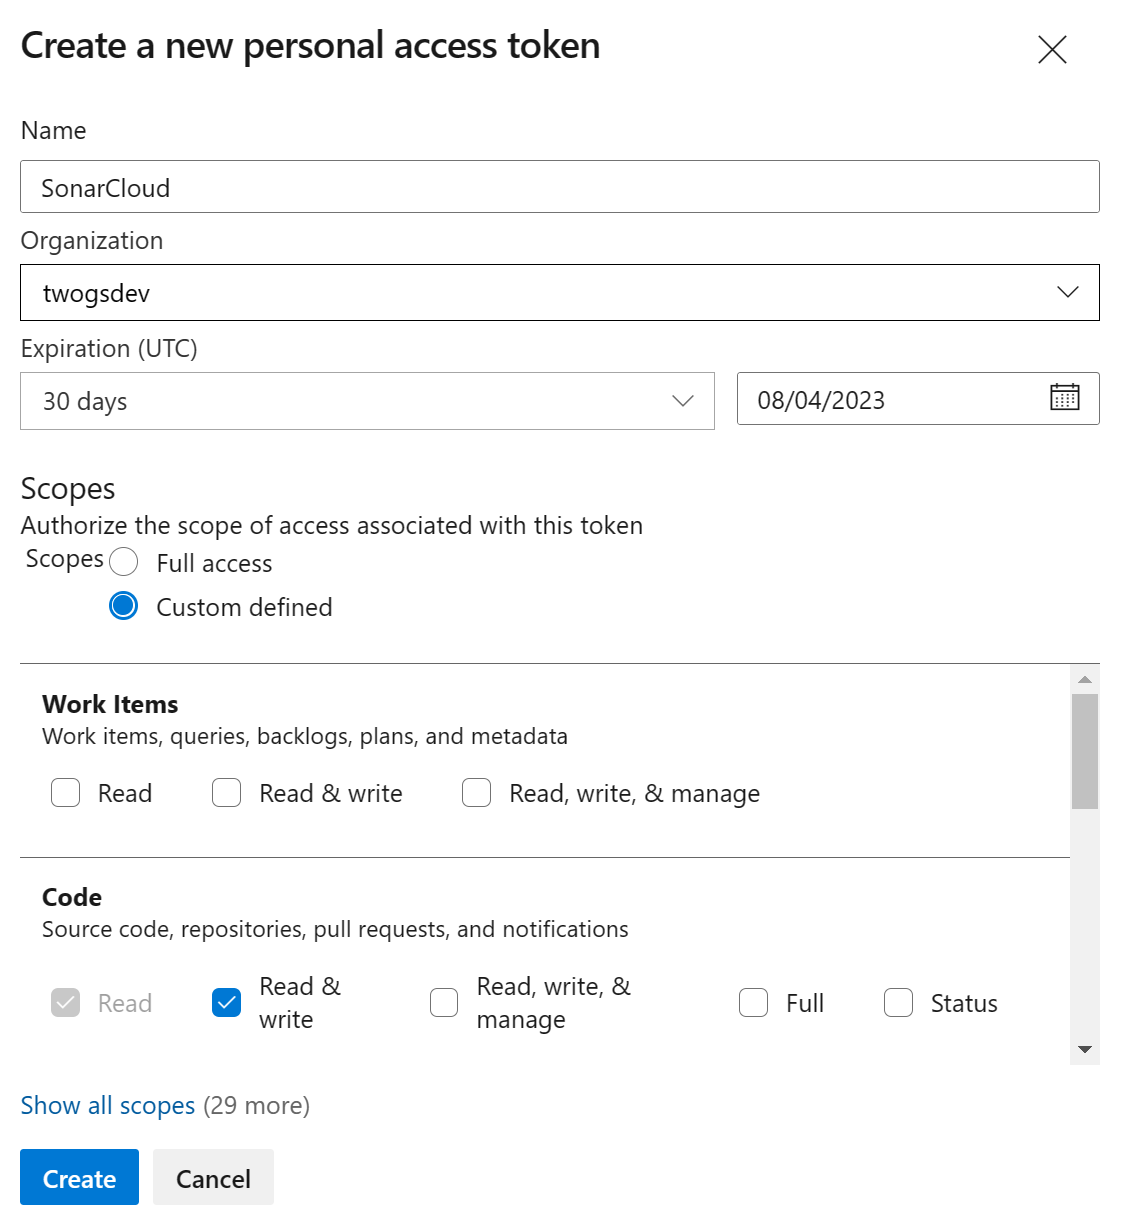
Link SonarCloud to Azure DevOps with Personal Access Token
Login to SonarCloud.
Select Import project from Azure, and then enter the following values, and then select Continue.
Parameter Value Azure DevOps organization name Your Organization name Personal Access Token (PAT) PAT created earlier 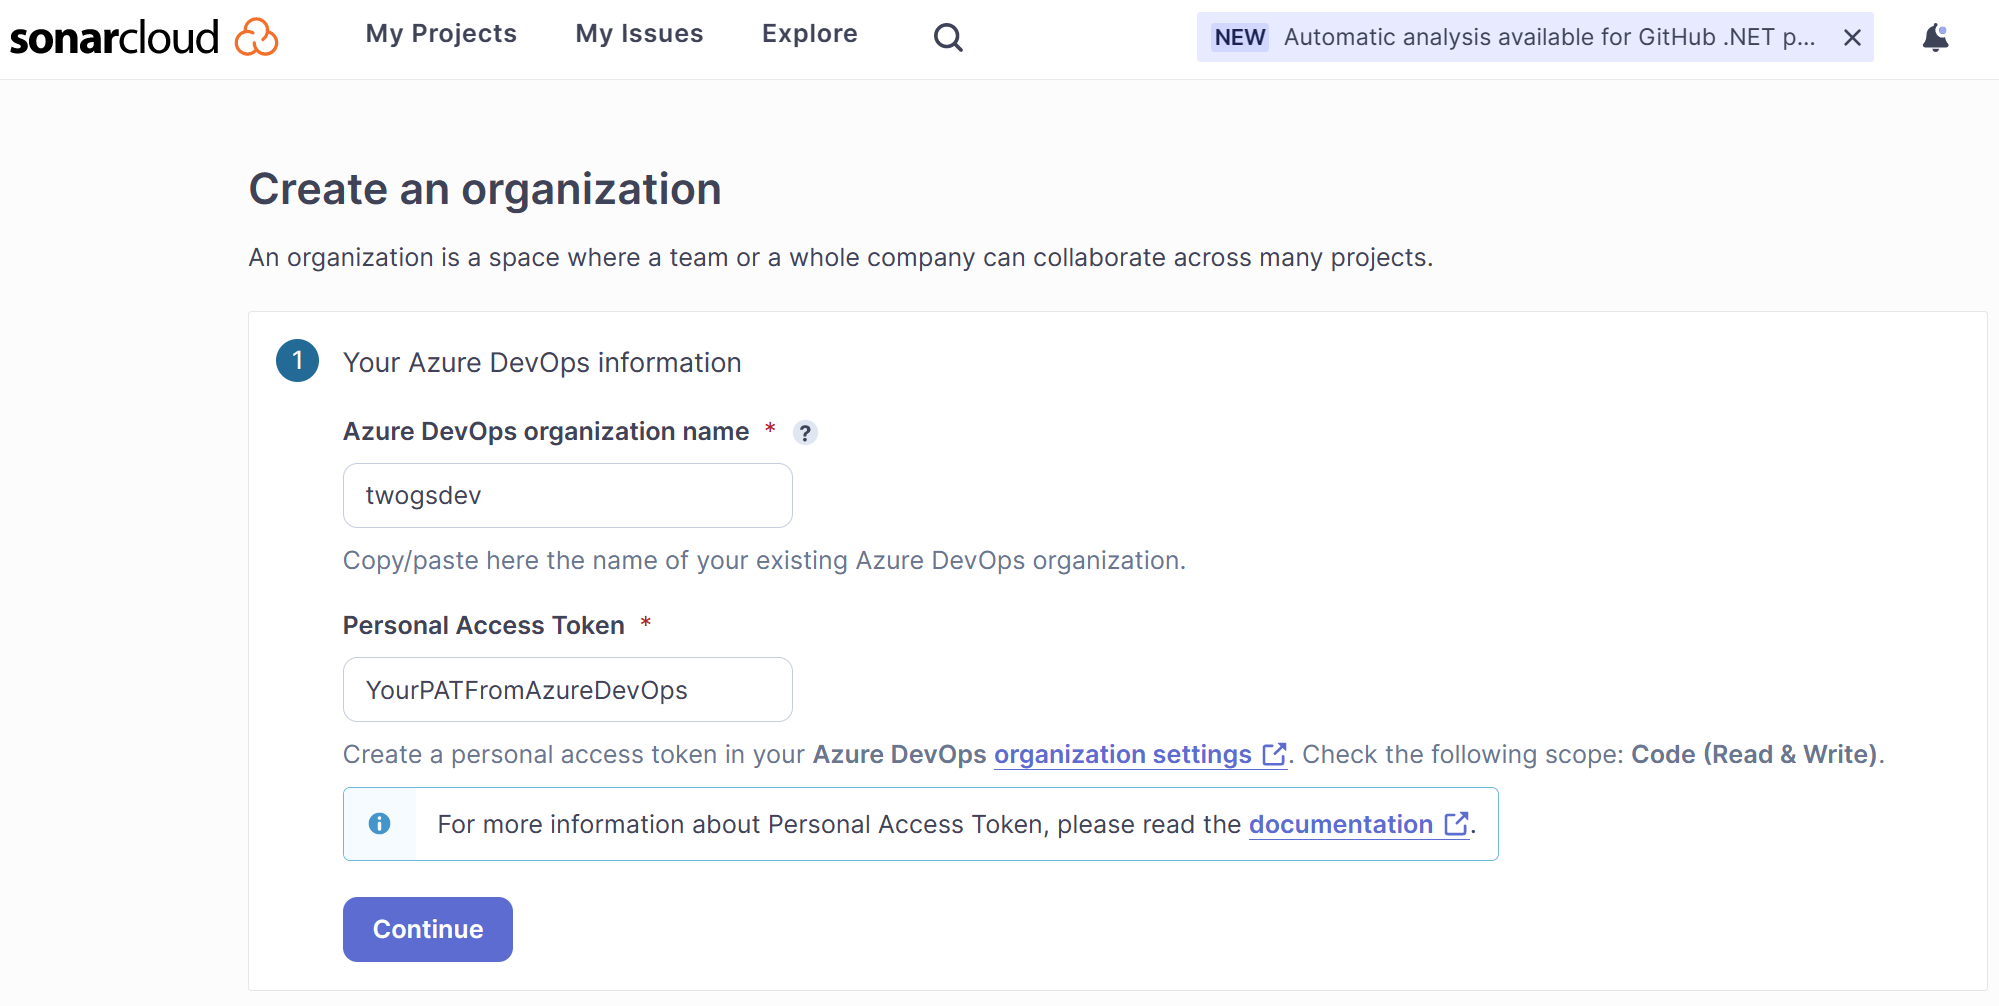
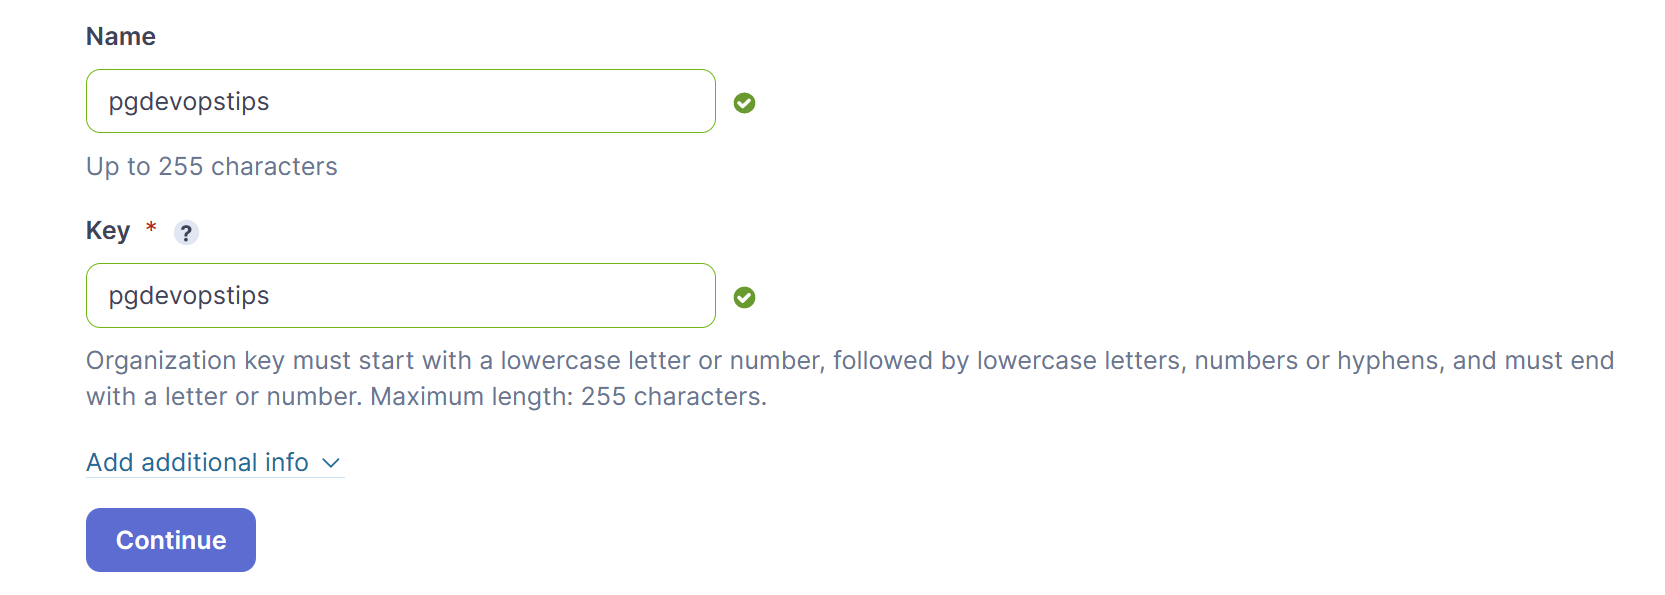
Under Import Organization details, enter a Name and Key which will be used to identify your organization in Azure Pipelines, and then select Continue.
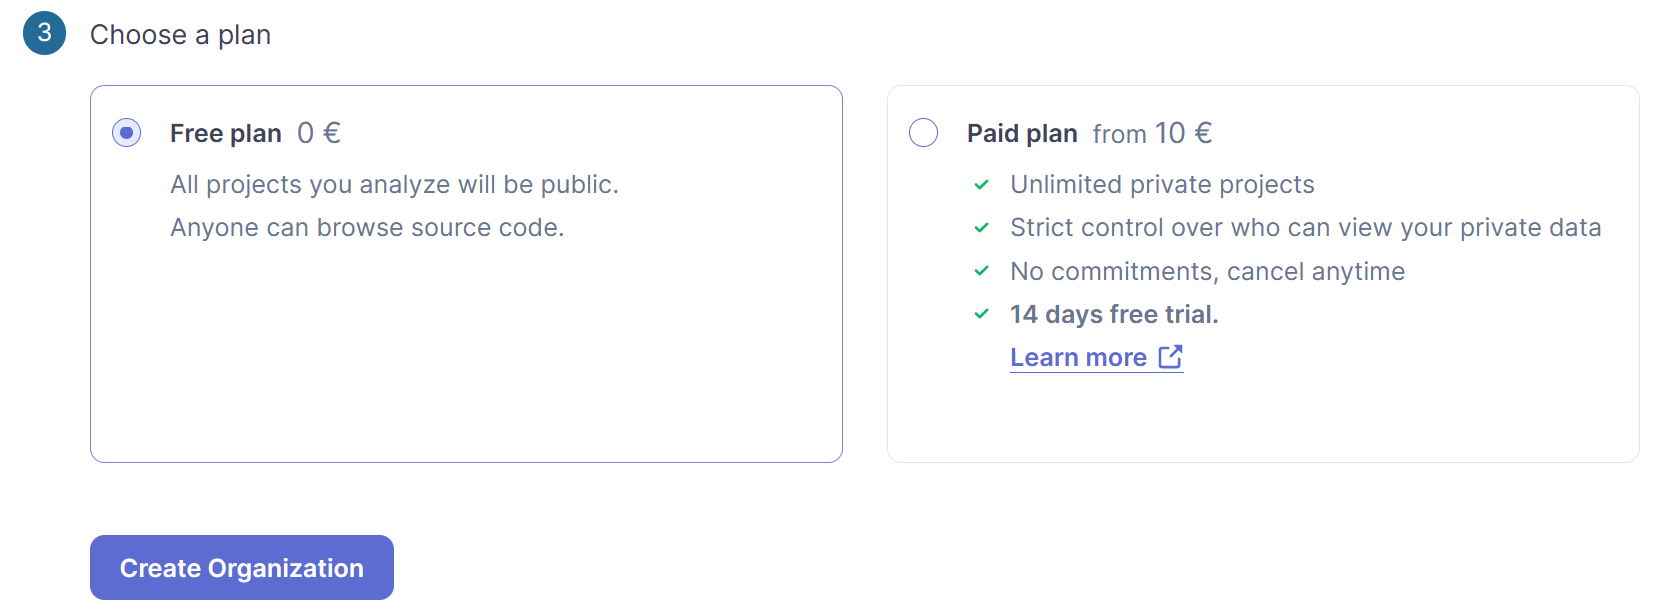
Select Free plan and then Create Organization.
Analyze an Azure DevOps project in SonarCloud
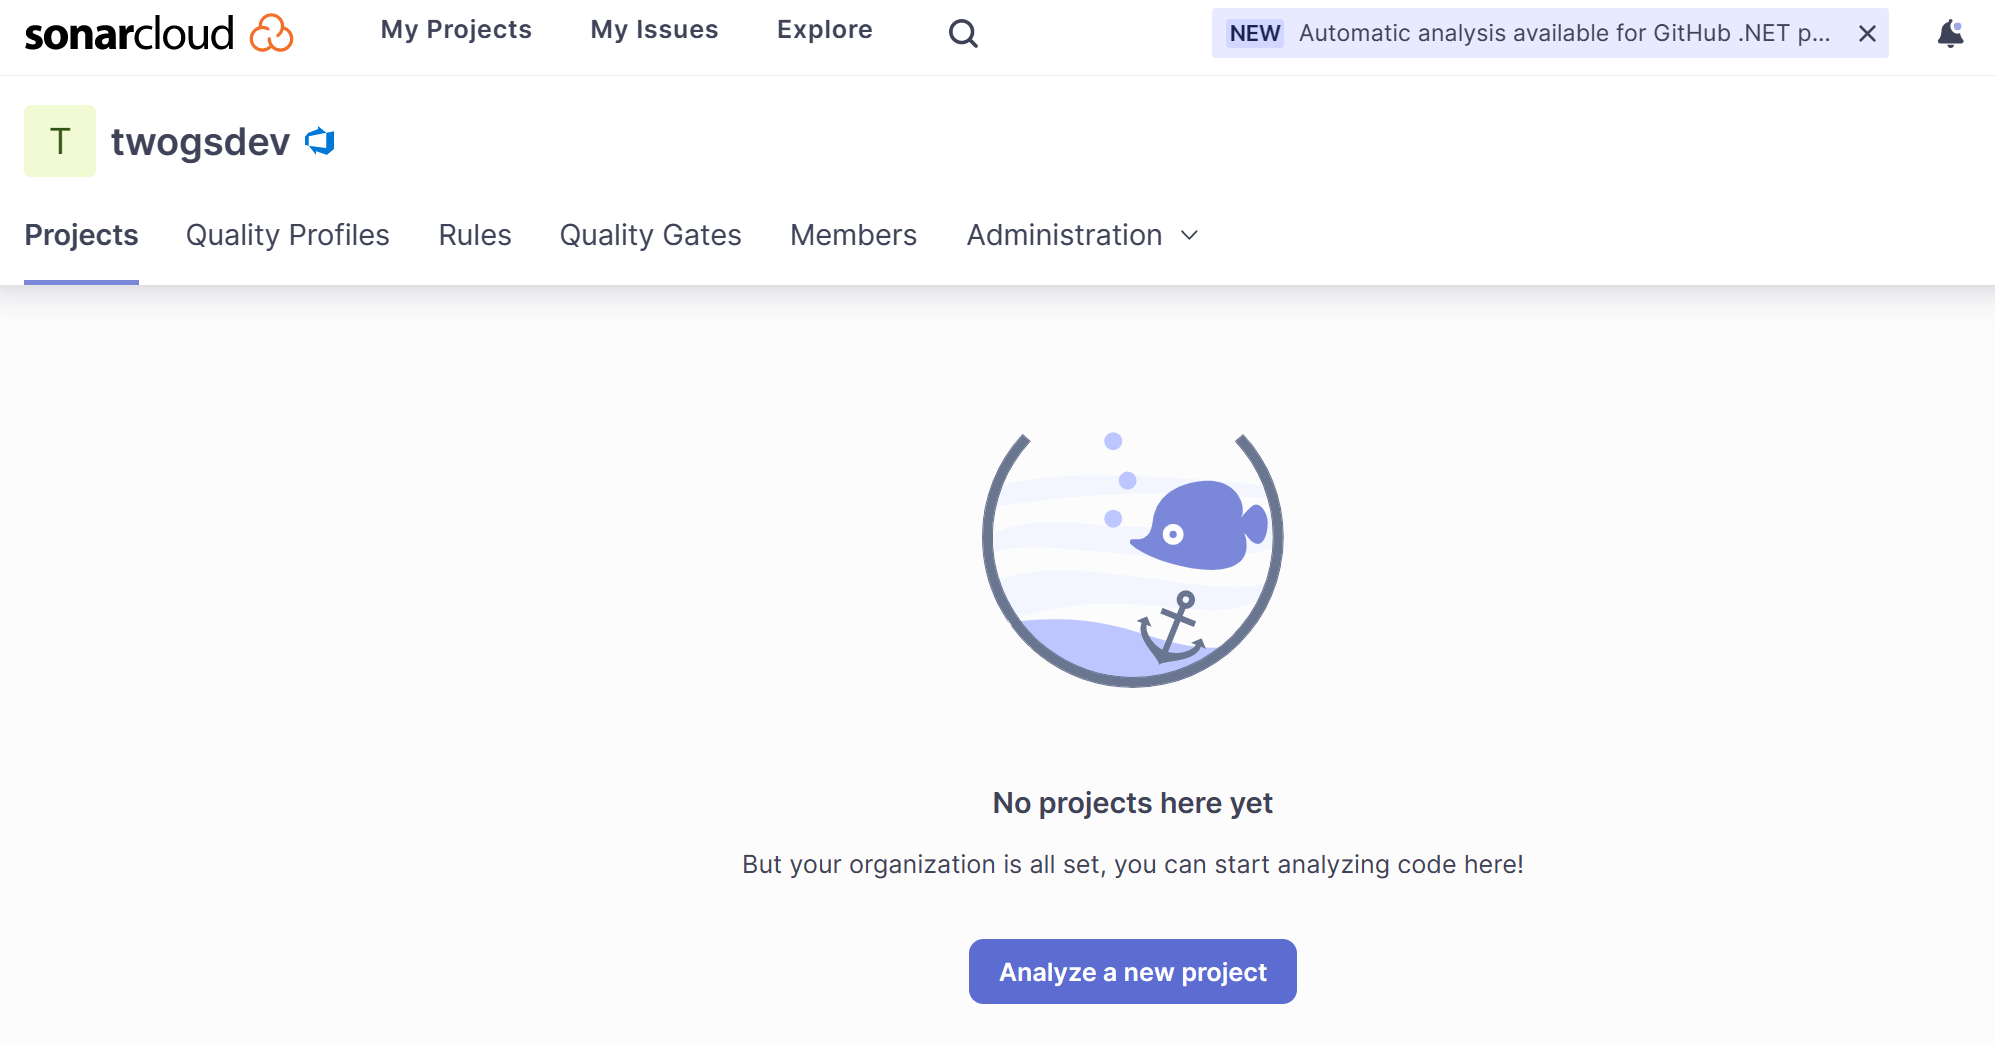
In the root of a SonarCloud Organization, select Projects, and then Analyze a new project.
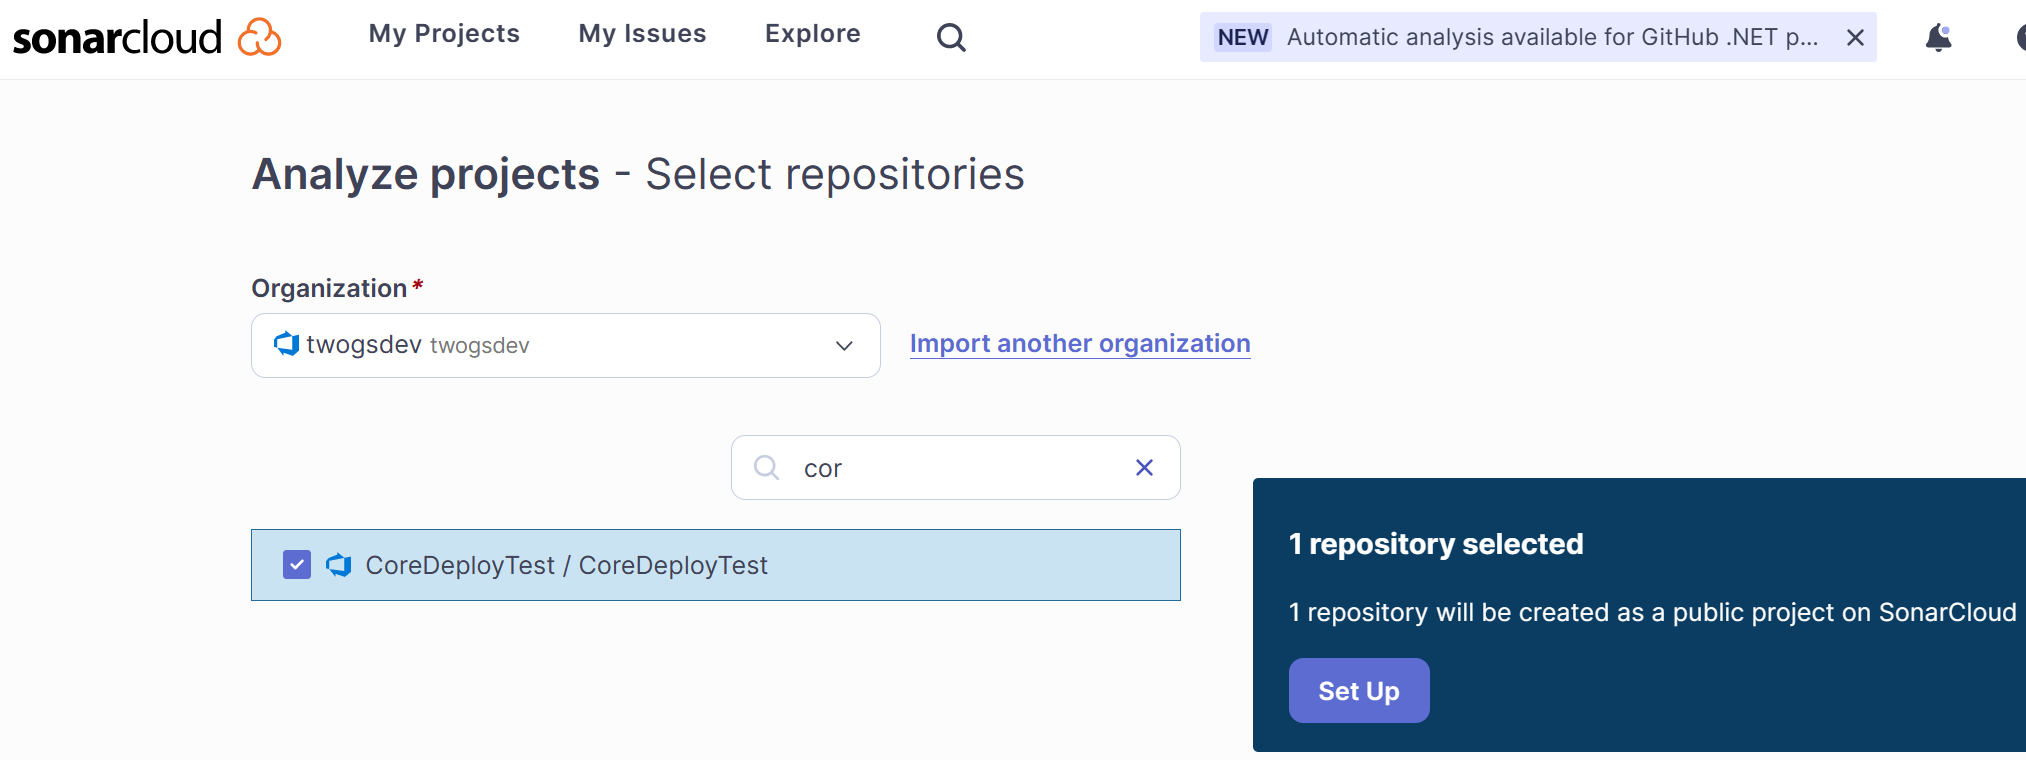
Select the Project, and then Set Up.
Select the analysis method With Azure DevOps Pipelines.

You will now be presented with instructions to setup the analysis which will be outlined in the following sections. Keep the instructions open as you will need information from them.
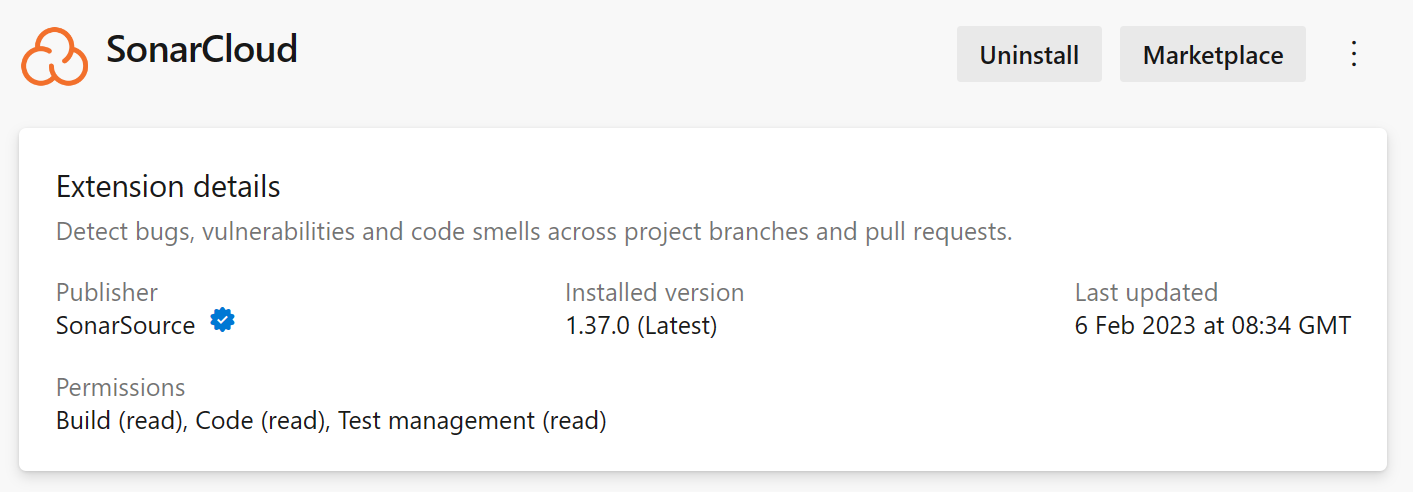
Add SonarCloud Extension to Azure DevOps
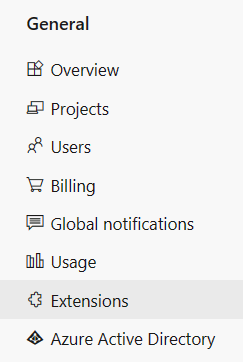
In the root of an Azure DevOps Organization, select Organization Settings in the bottom left of the screen.
In the General section, select Extensions.
Select Browse marketplace.

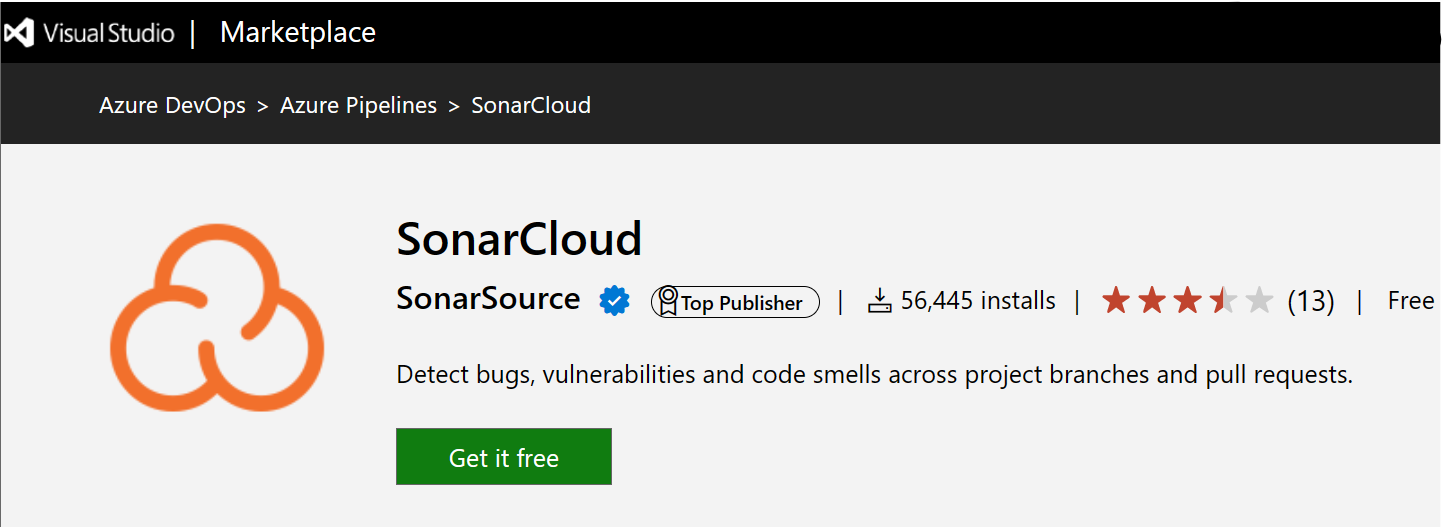
Search for SonarCloud, and then select SonarCloud.
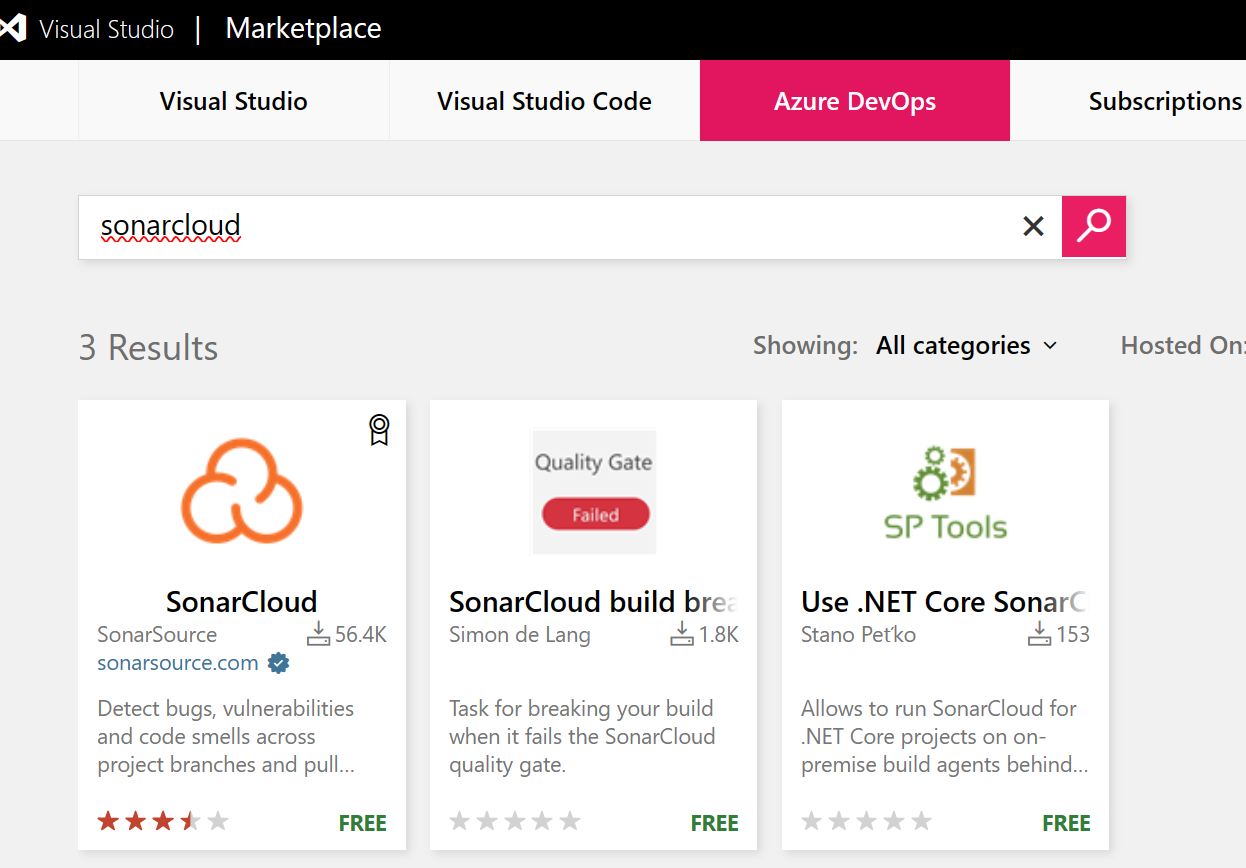
Select Get if free, and then select Install.
In the Extensions section, SonarCloud is now installed.
Add SonarCloud Service Connection to an Azure DevOps Project
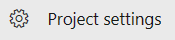
From the root of an Azure DevOps Project, select Project settings in the bottom left of the screen.
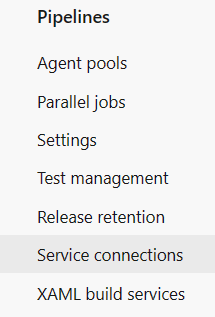
In the Pipelines section, select Service connections.
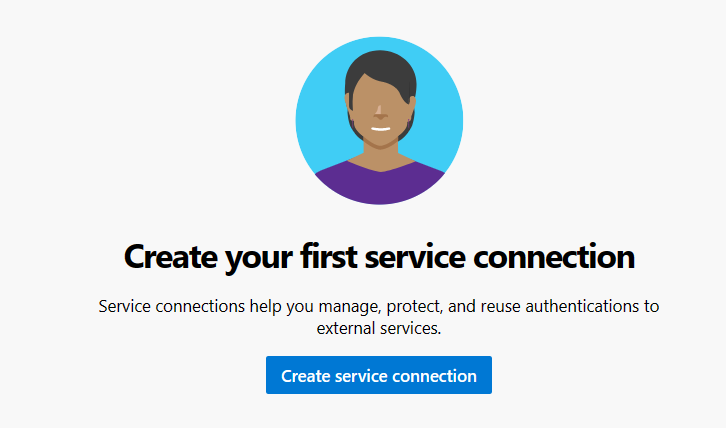
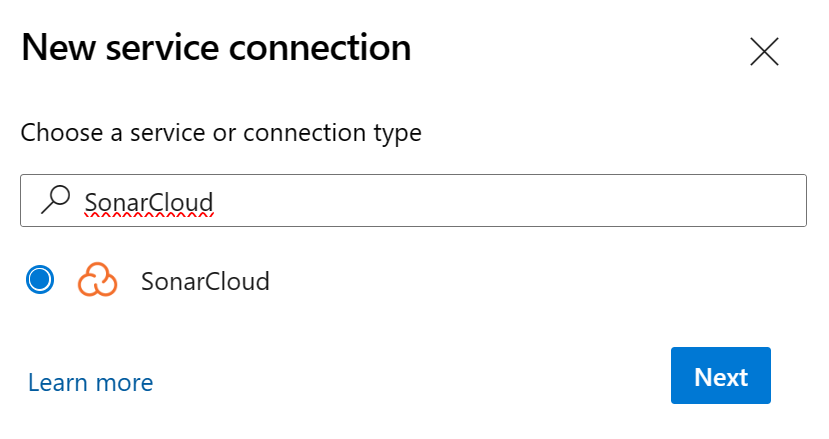
Select Create service connection.
Search for SonarCloud, then select Next.
Enter the following values, and then select Verify and Save.
Parameter Value SonarCloud Token Your SonarCloud Token see below for instructions Service connection name SonarCloud Grant access permission to all pipelines True 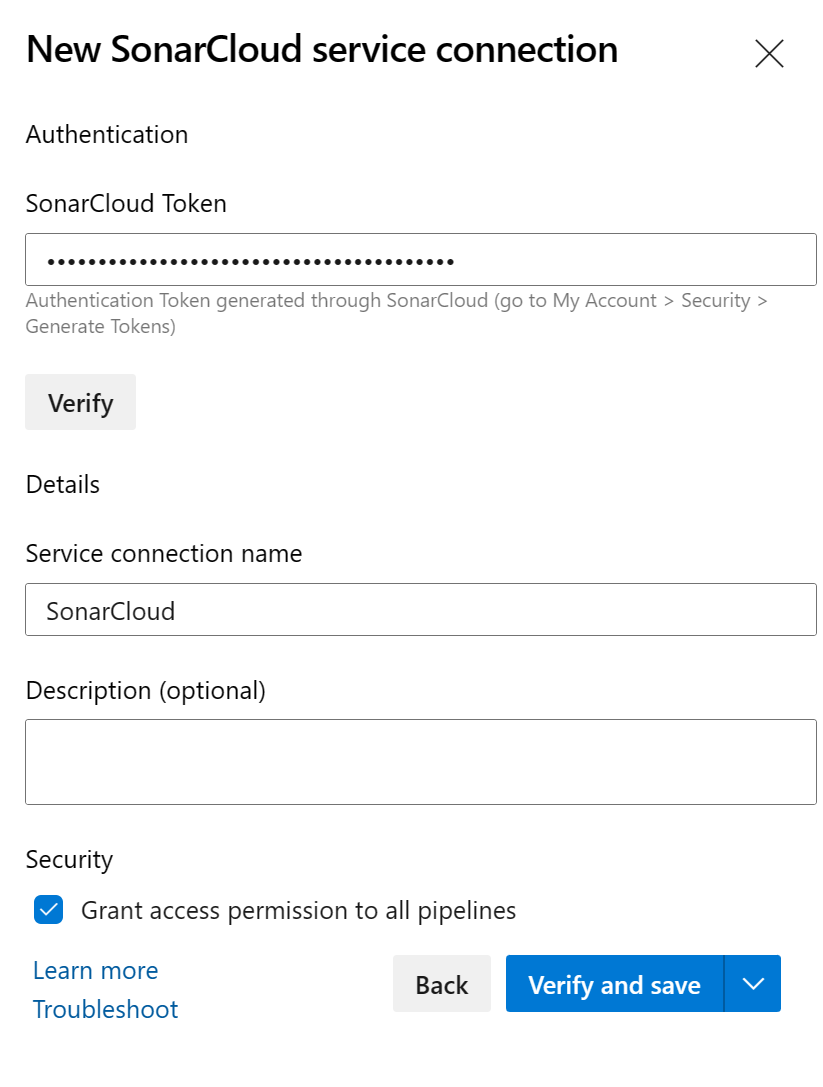
Copy and paste the SonarCloud Token from the instructions Use this token under the Add a new SonarCloud Service Endpoint section into Azure DevOps Service Connection Setup SonarCloud Token text box.

Configure Azure DevOps Pipeline with SonarCloud Code Analysis
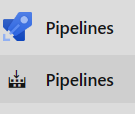
In the root of an Azure DevOps Project, select Pipelines.
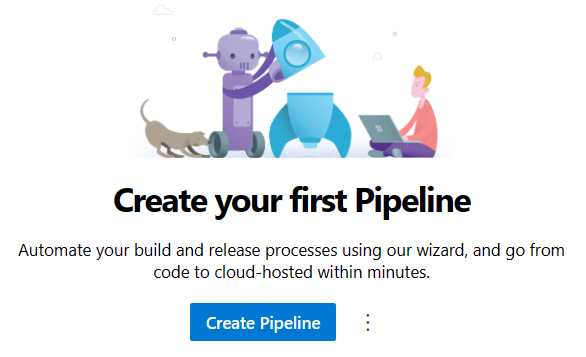
Select Create Pipeline.
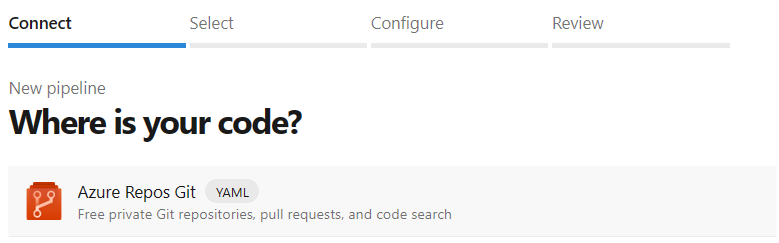
In the Connect tab, Select Azure Repos Git.
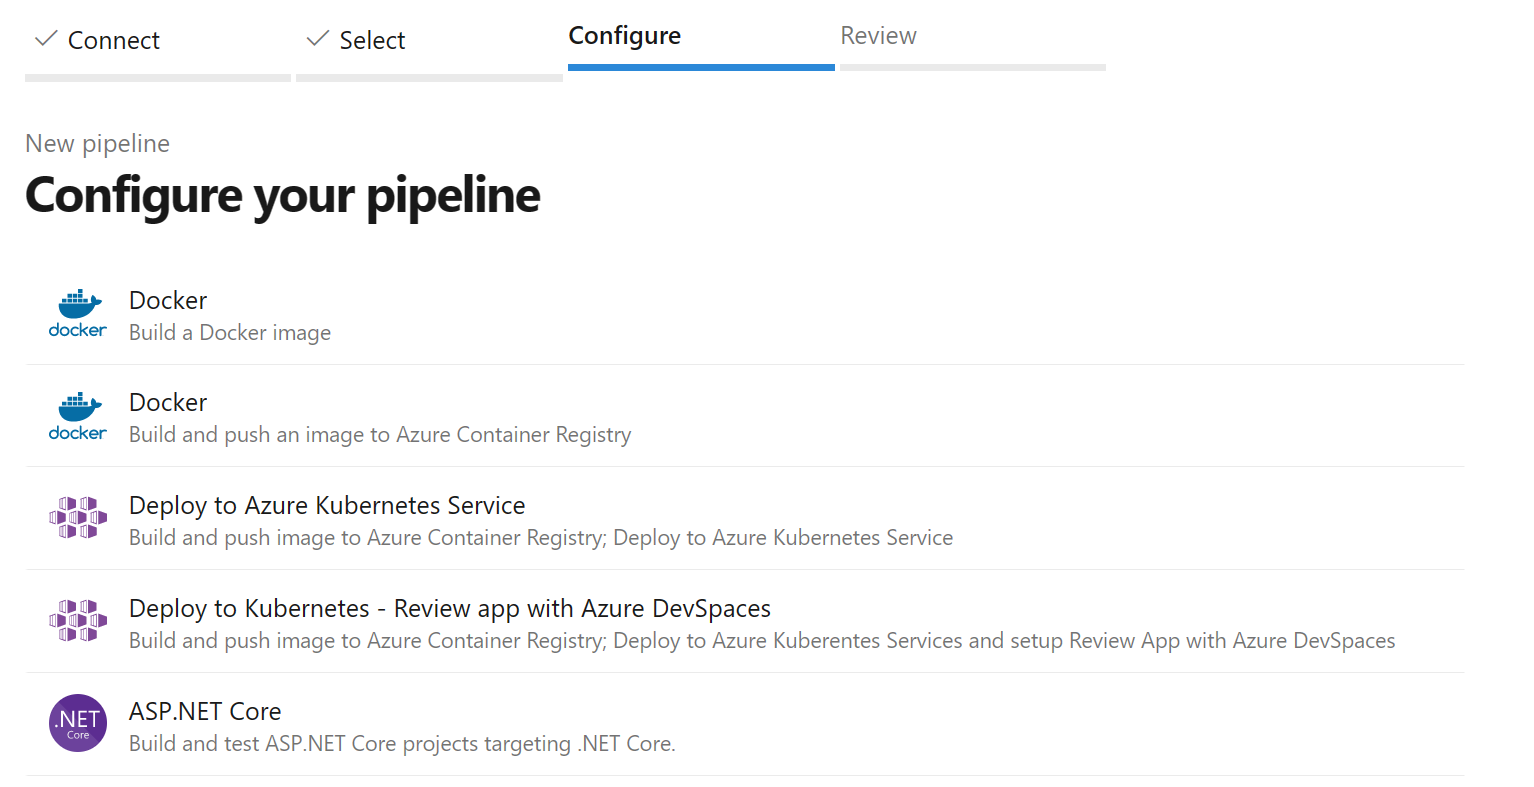
In the Select tab, select ASP.NET Core YAML template.
Go to the SonarCloud instructions, select .NET build, under the Configure Azure Pipeline section.
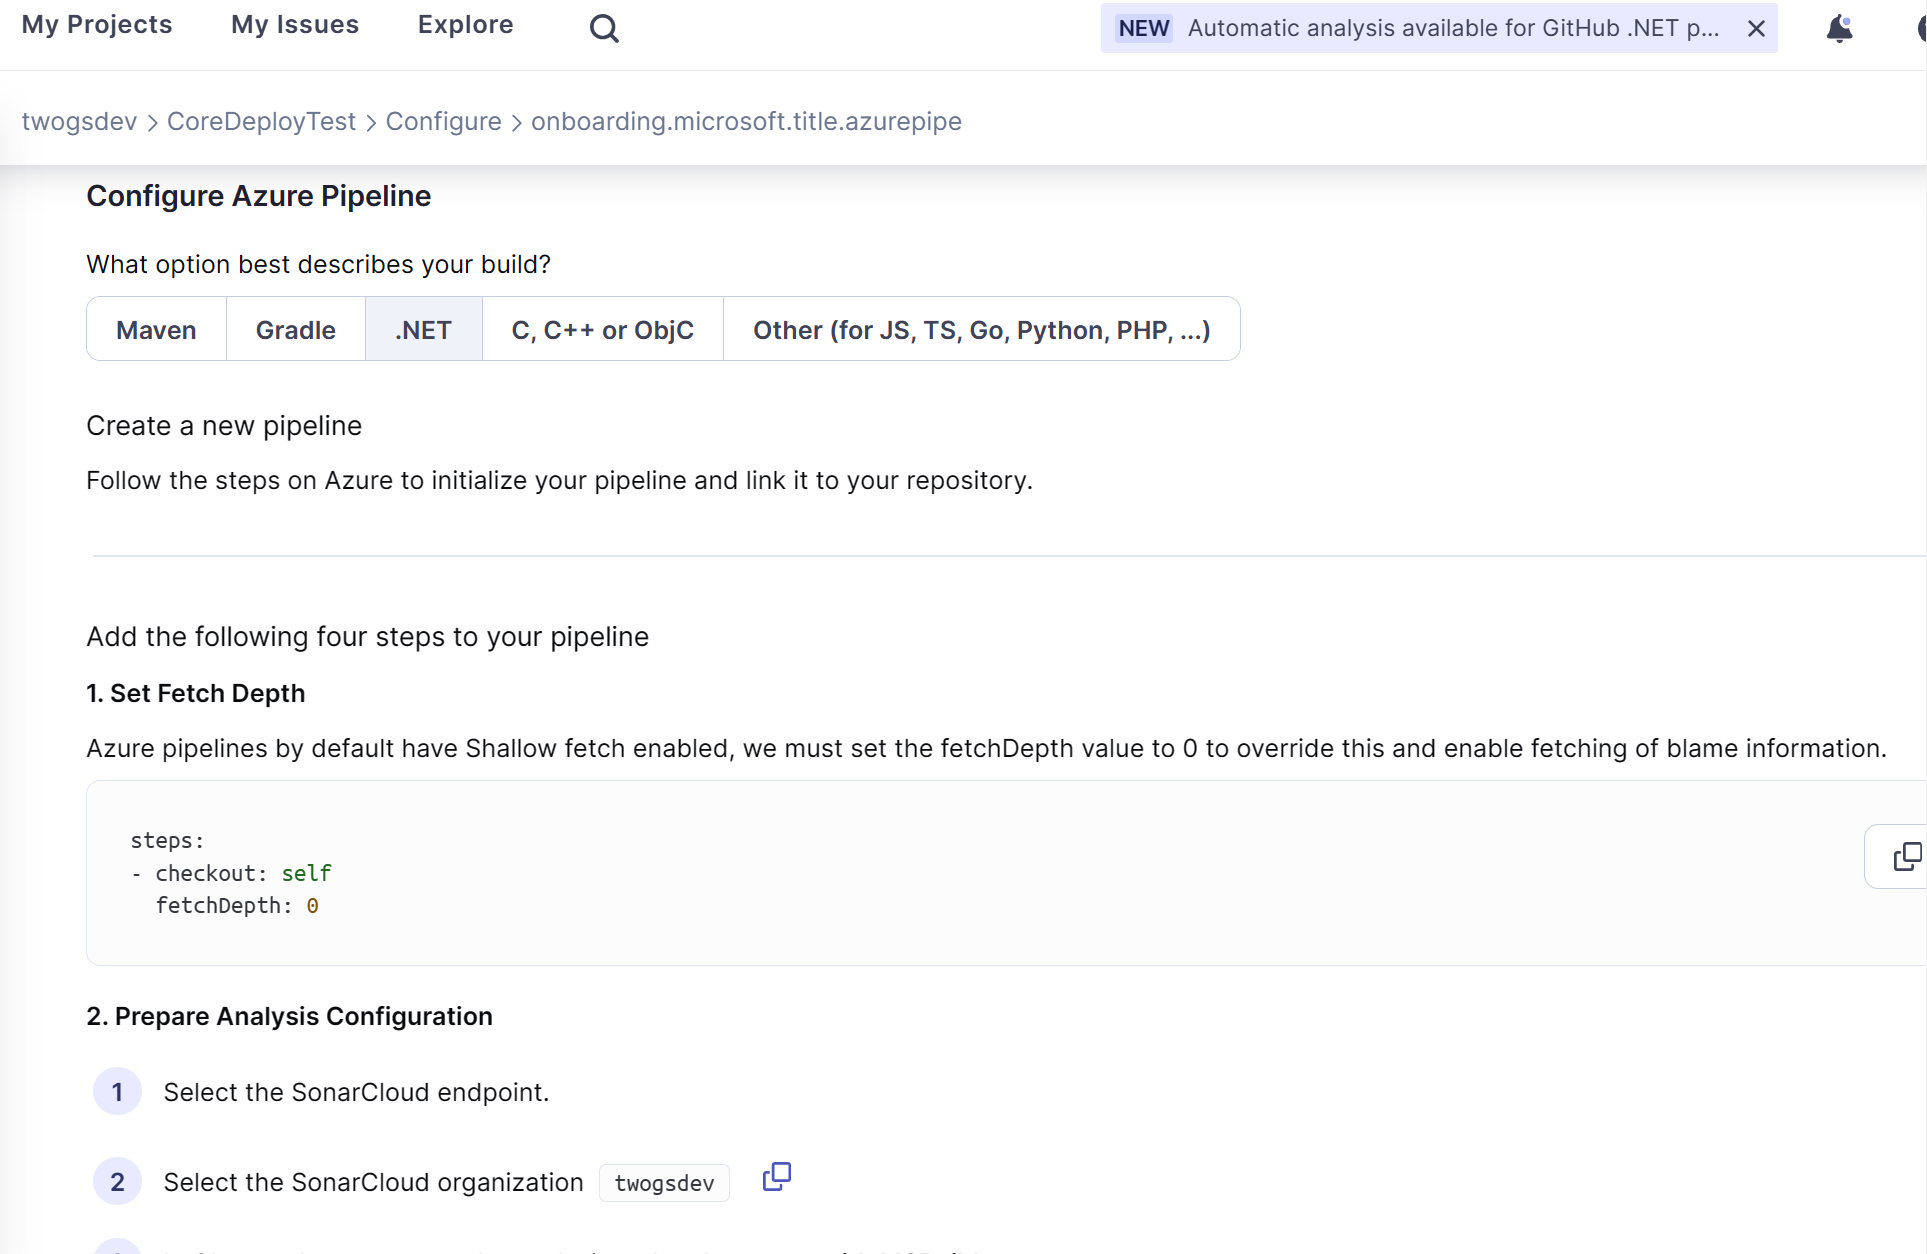
Replace the Contents of the YAML file with the following YAML replacing
{Your...}with your organization, project key and project name from the SonarCloud instructions.trigger: - master pool: vmImage: ubuntu-latest variables: twogsdevProjectVersion: '1.0.0-$(Build.BuildNumber)' steps: - task: SonarCloudPrepare@1 inputs: SonarCloud: 'SonarCloud' organization: 'twogsdev' scannerMode: 'MSBuild' projectKey: 'twogsdev_CoreDeployTest' projectName: 'CoreDeployTest' projectVersion: '$(twogsdevProjectVersion)' - task: DotNetCoreCLI@2 inputs: command: 'build' - task: SonarCloudAnalyze@1 - task: SonarCloudPublish@1 inputs: pollingTimeoutSec: '300'Rename the pipelines YAML file to sonarcloud-az-pipeline.yml and then select Save and run.

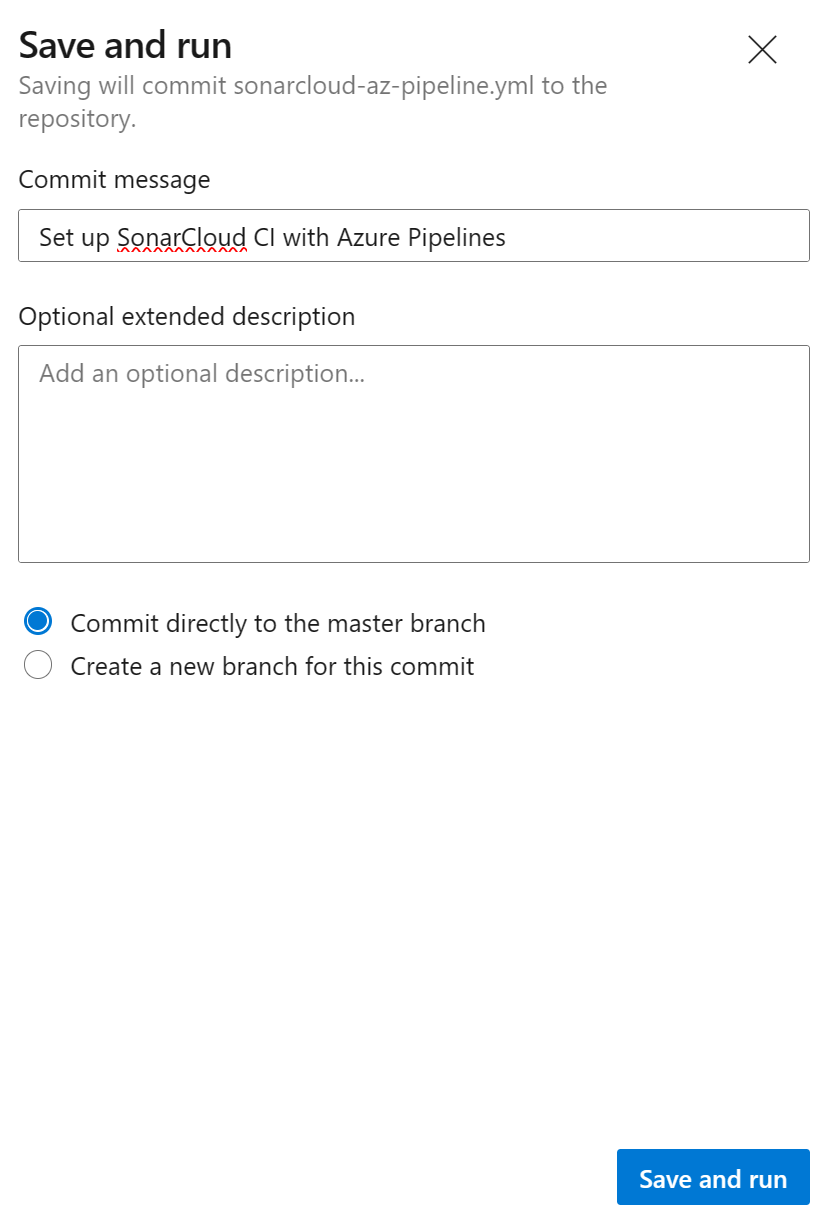
Add a commit message and then select Save and run.
Once the build has completed, in the Build Summary, select Extensions, and then Detailed SonarCloud Report.
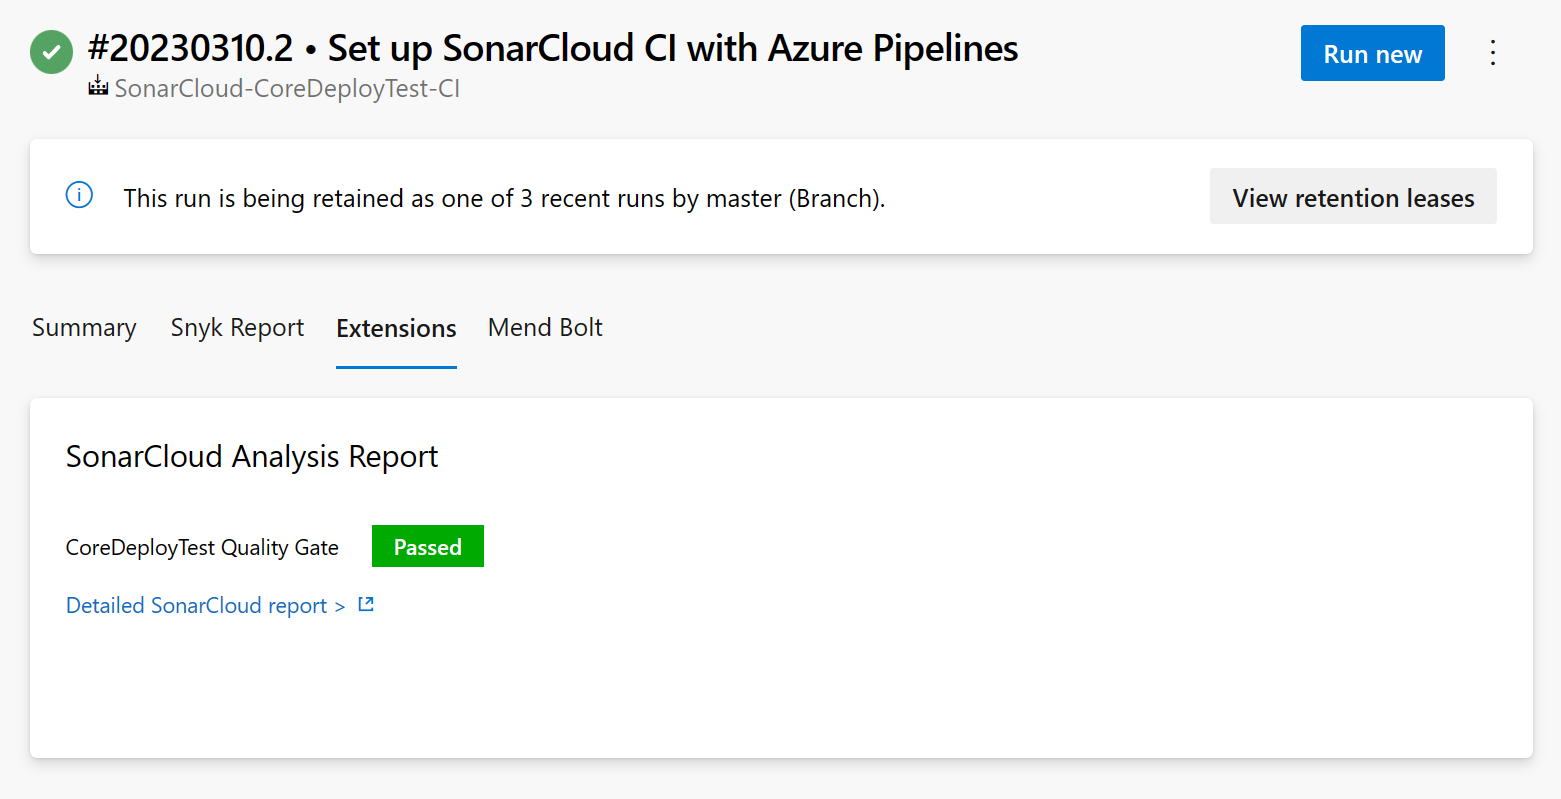
In order to see the Quality Gate result in Azure DevOps Pipelines. A Code Definition needs configuring in SonarCloud. Follow the next steps to set this up.
Setup Quality Gate in SonarCloud
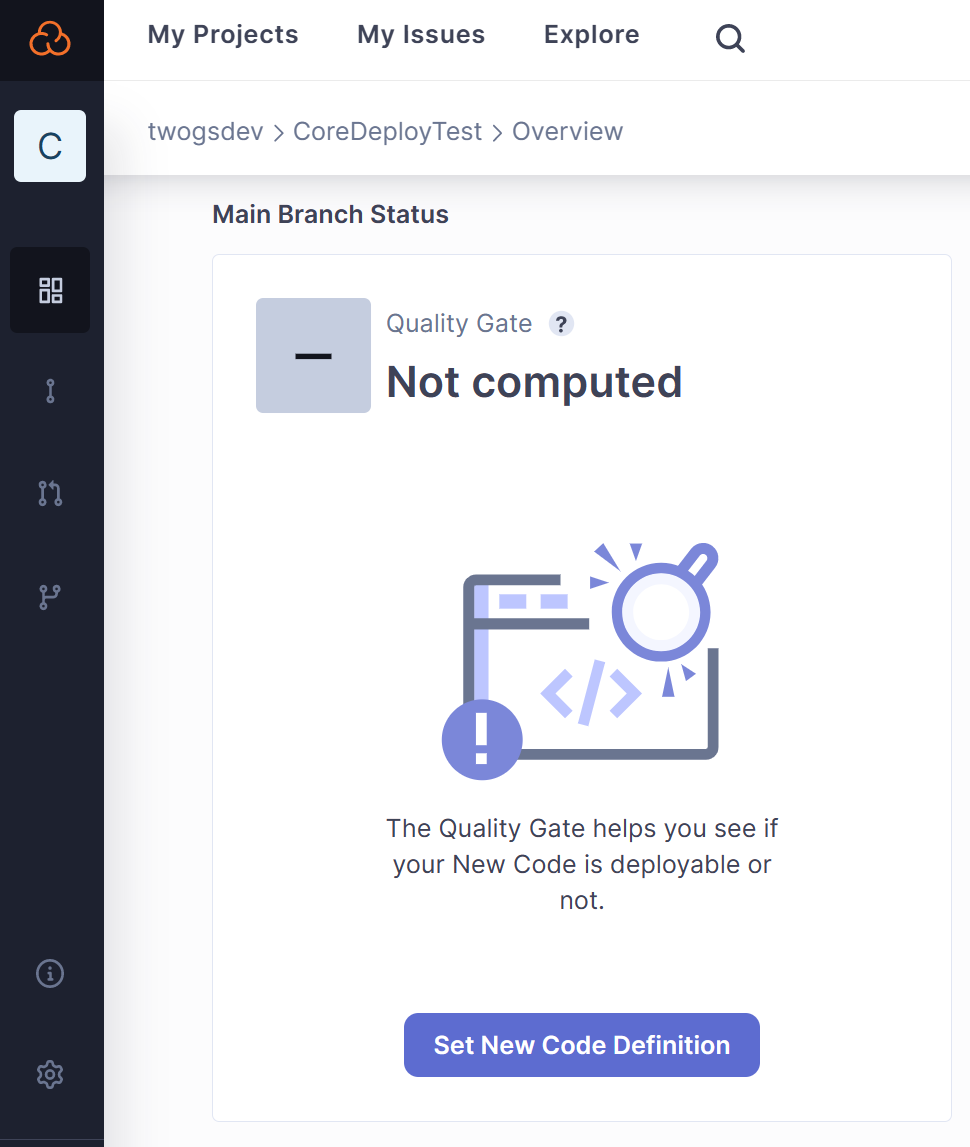
In the SonarCloud Project Overview, select Set New Code definition.
Select Previous Version, this corresponds to the
projectVersionadded to the pipeline YAML earlier.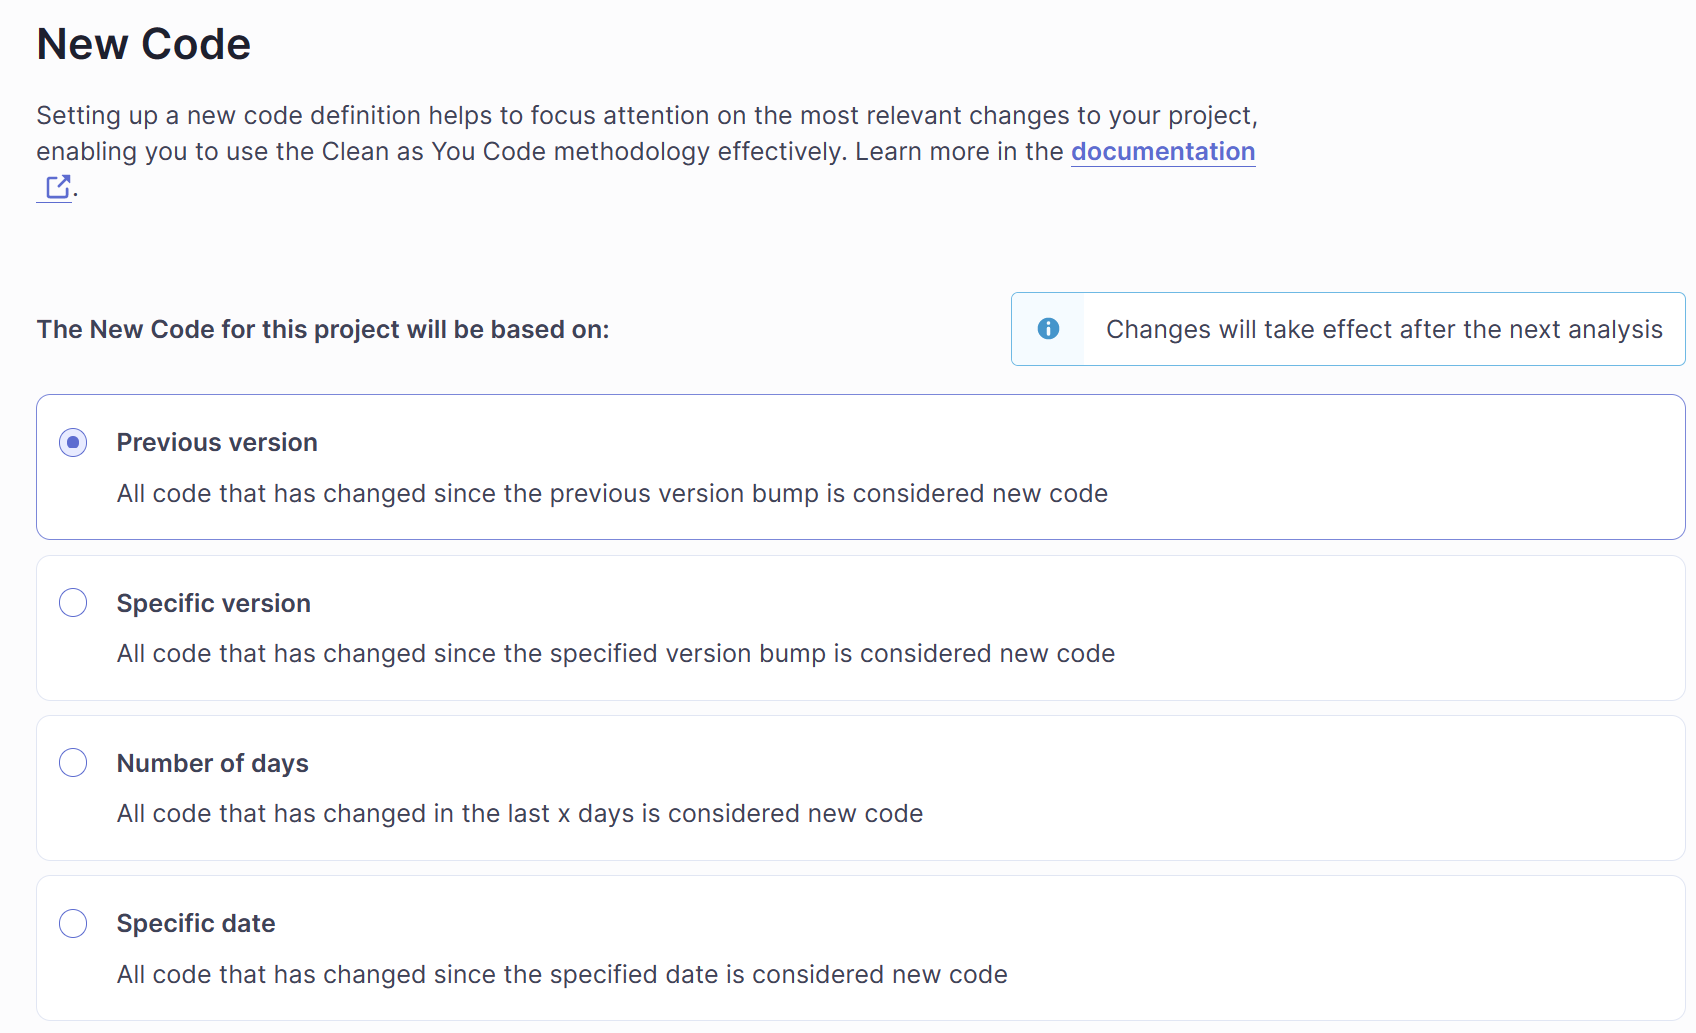
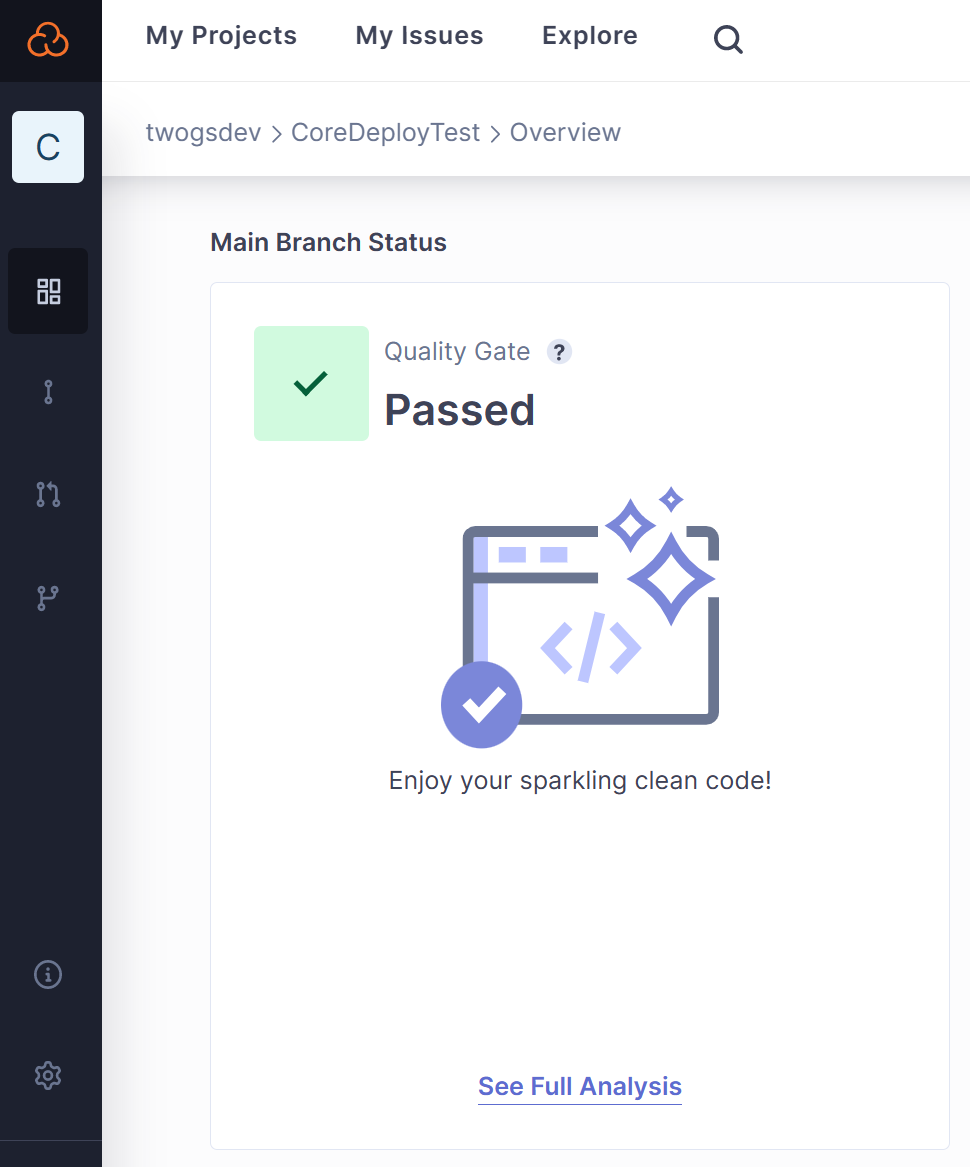
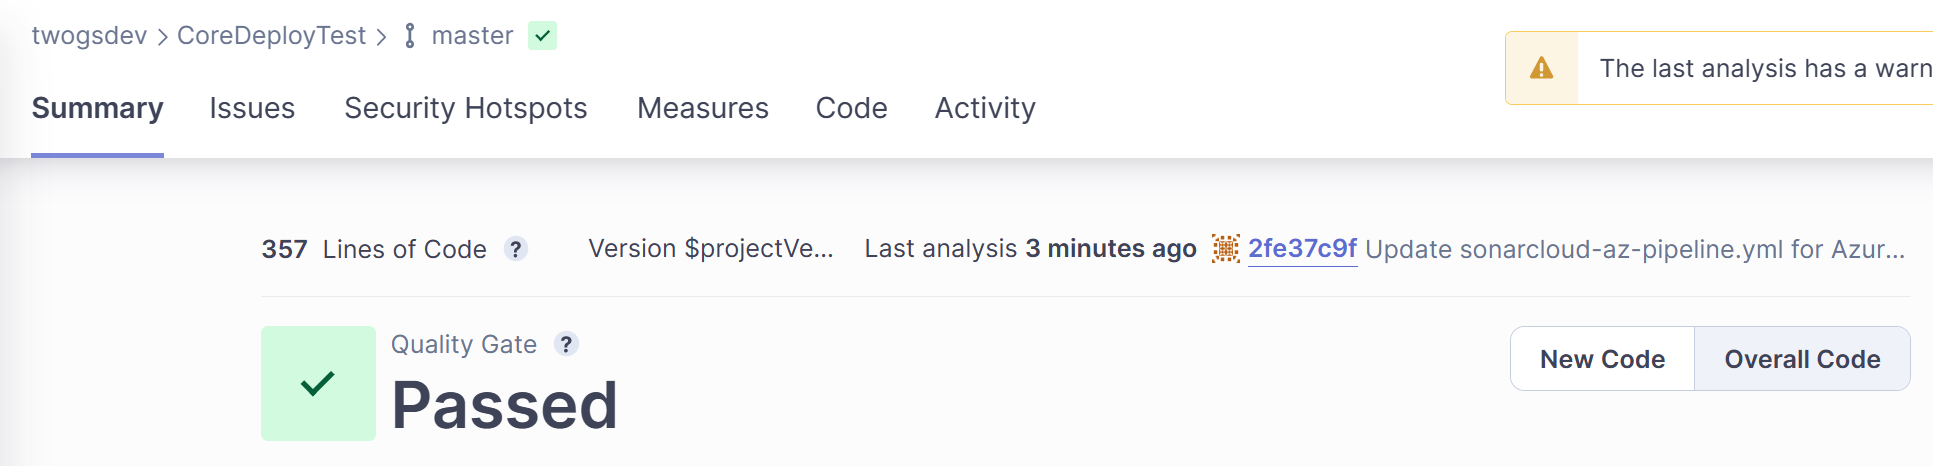
Once configured, in Azure DevOps Pipelines, select Run new. Once the Azure Pipeline has finished building and analyzing, select Detailed SonarCloud Report.
In SonarCloud select See Full Analysis.
The Detailed Report will be opened.
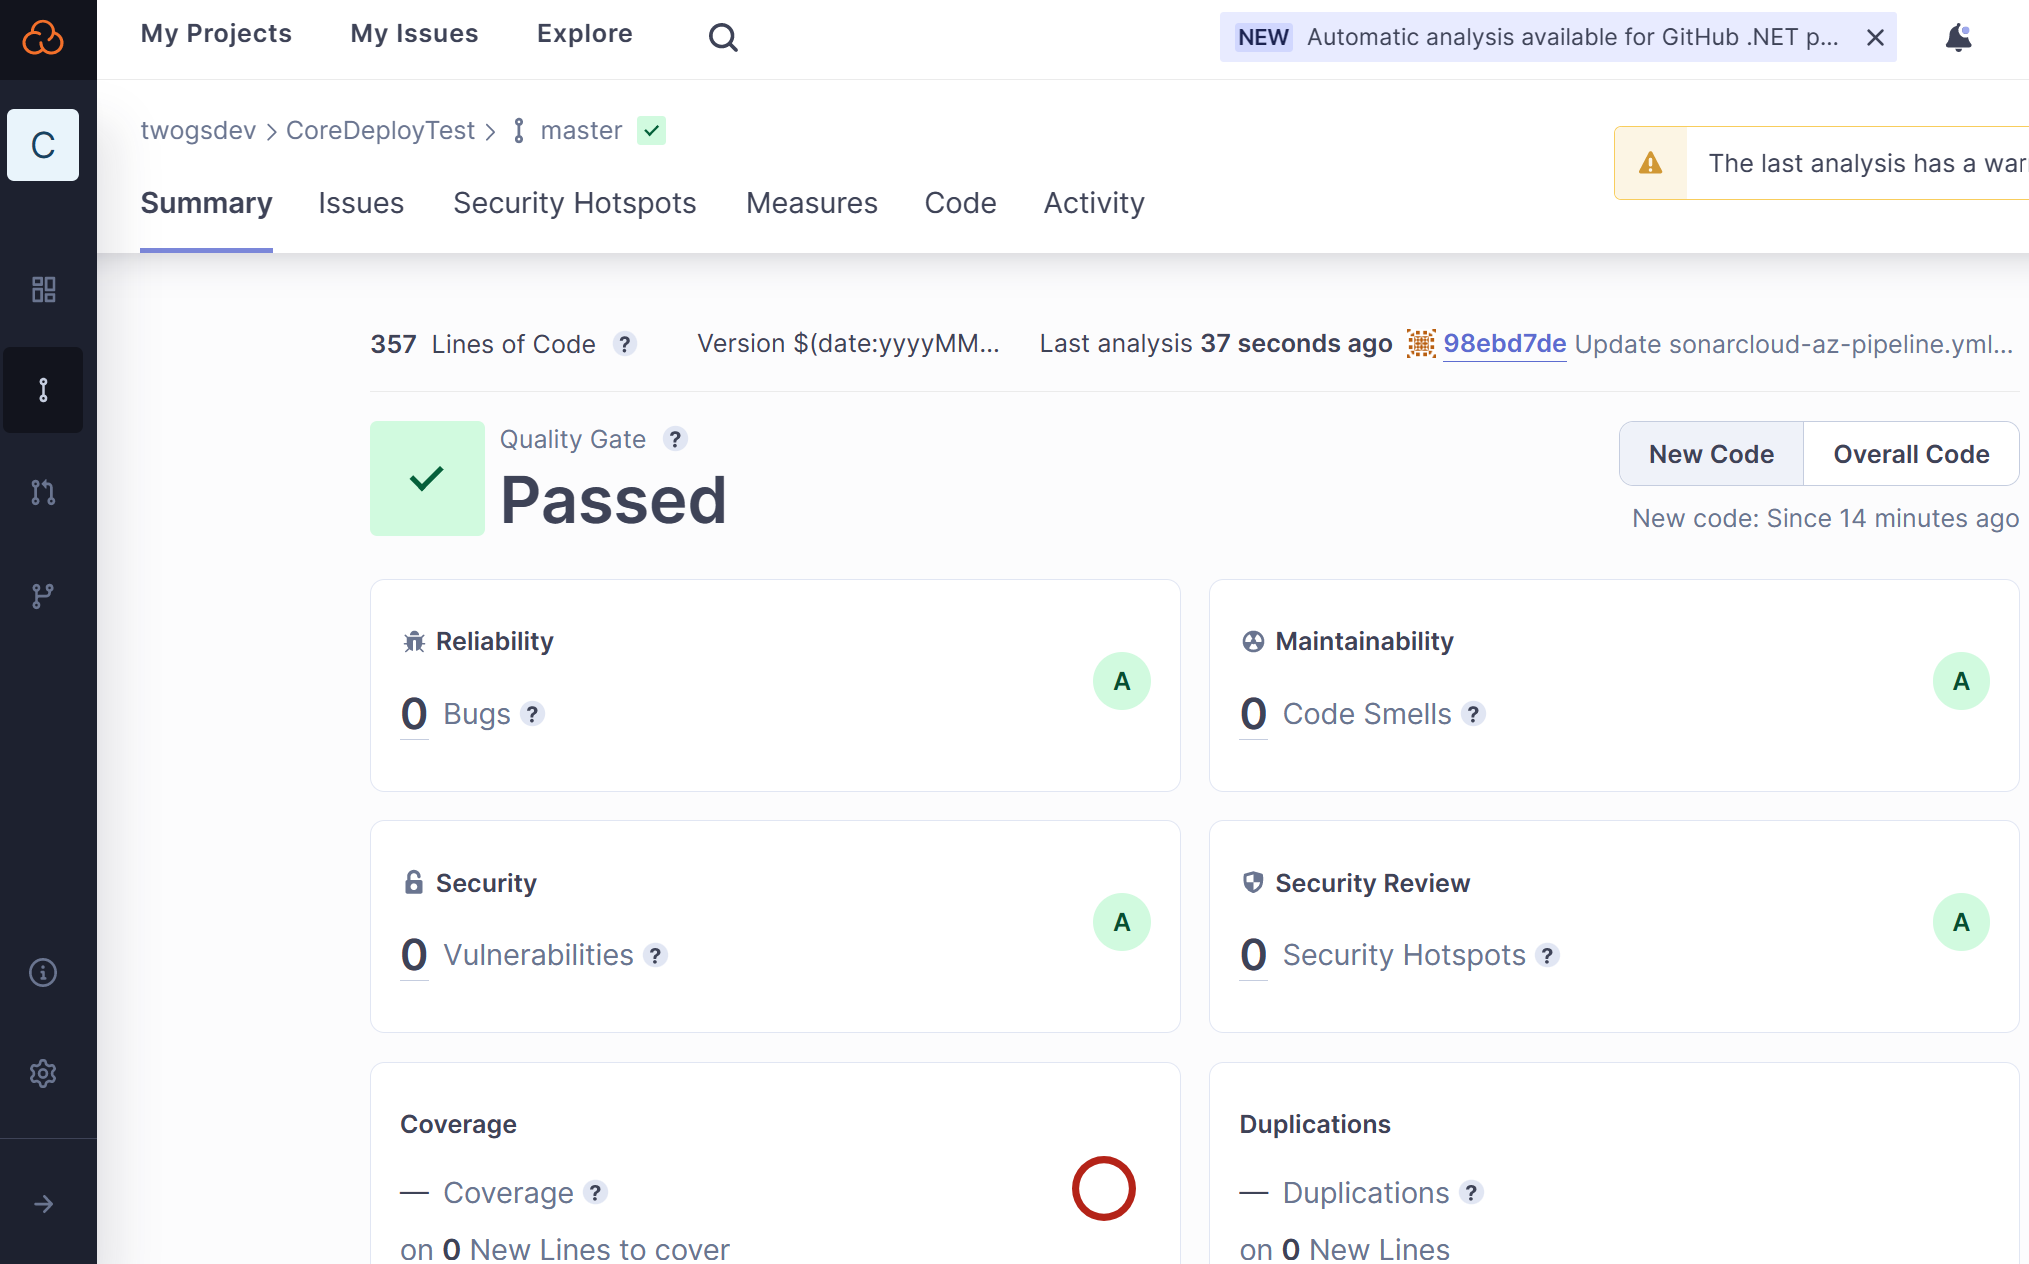
Analyze SonarCloud Report
In the SonarCloud Dashboard, select the Your Project > See Full Analysis, then Overall Code.
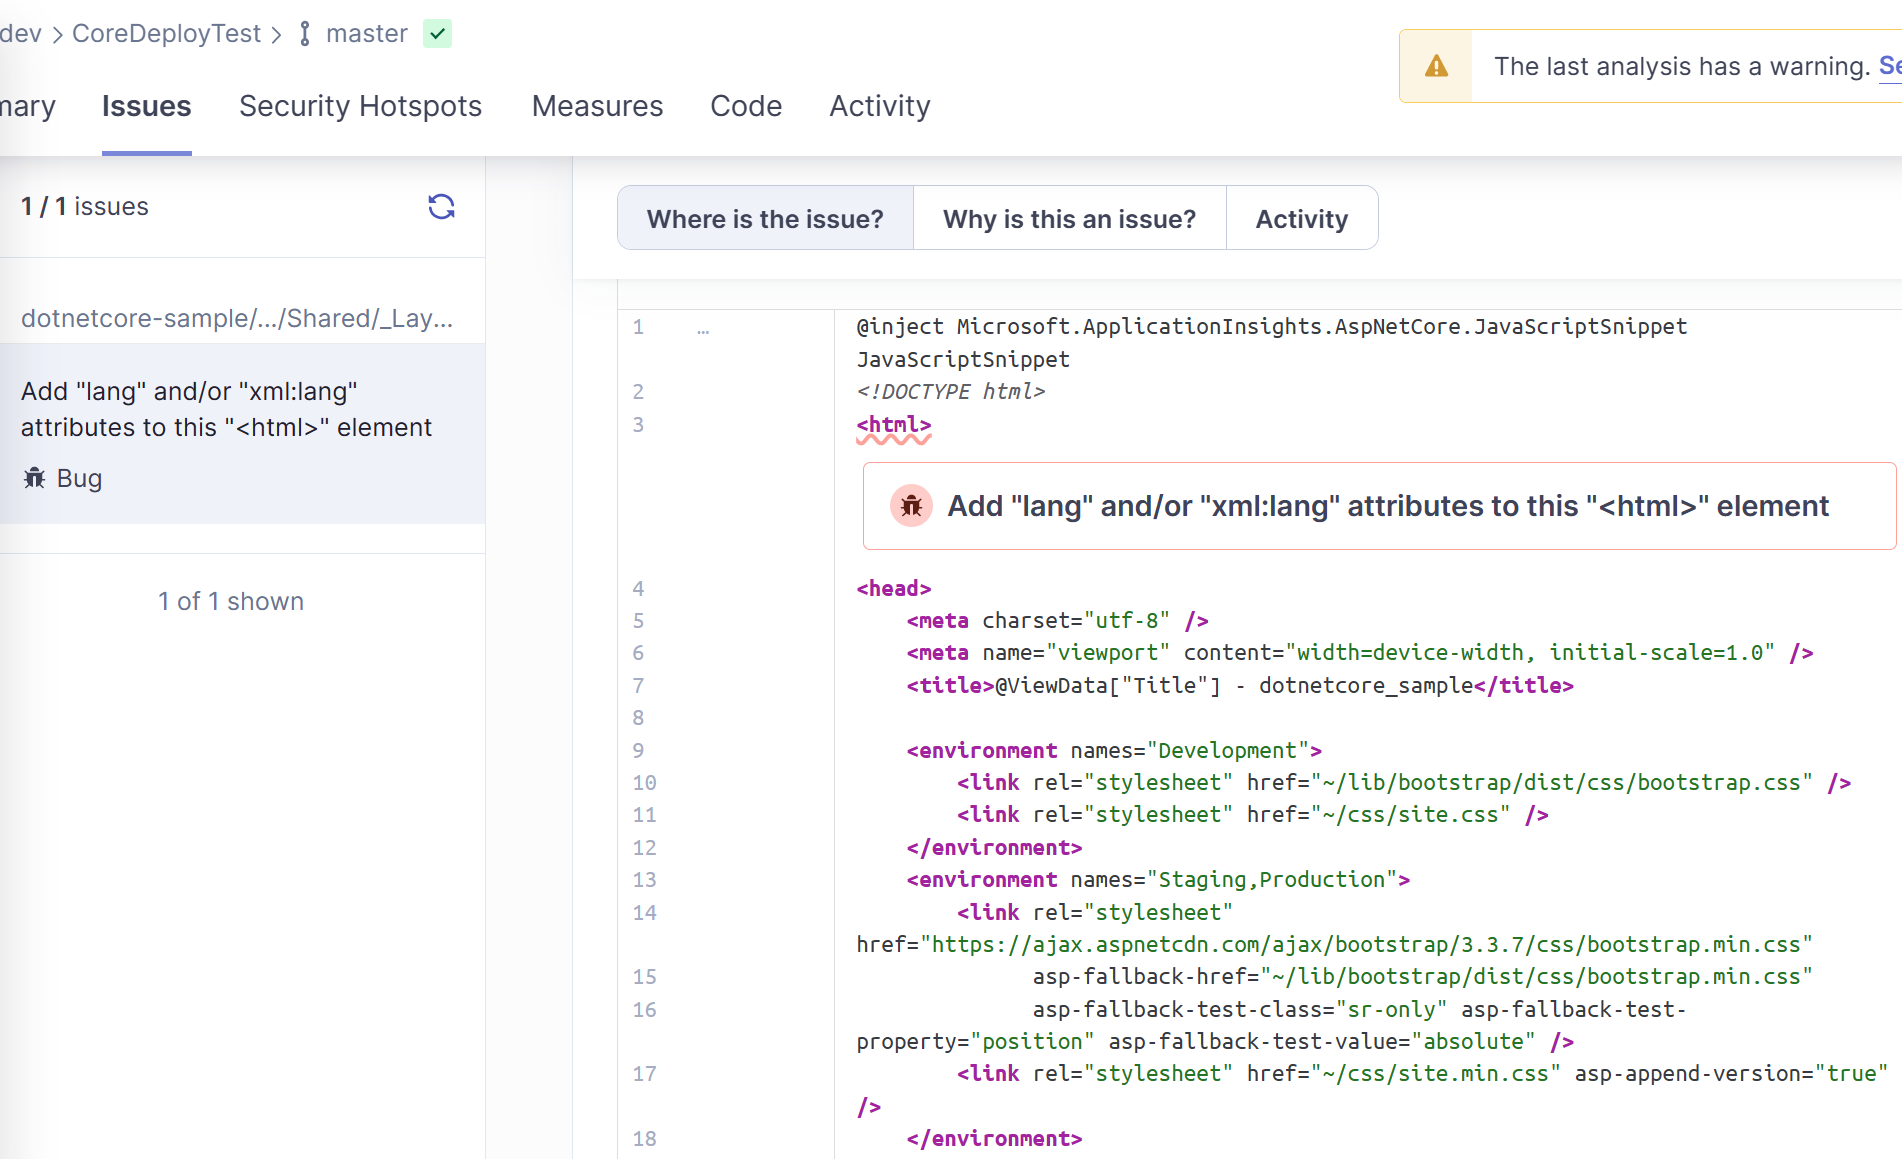
Under Reliability, you will see a bug has been found. Select the Number next to Bugs.
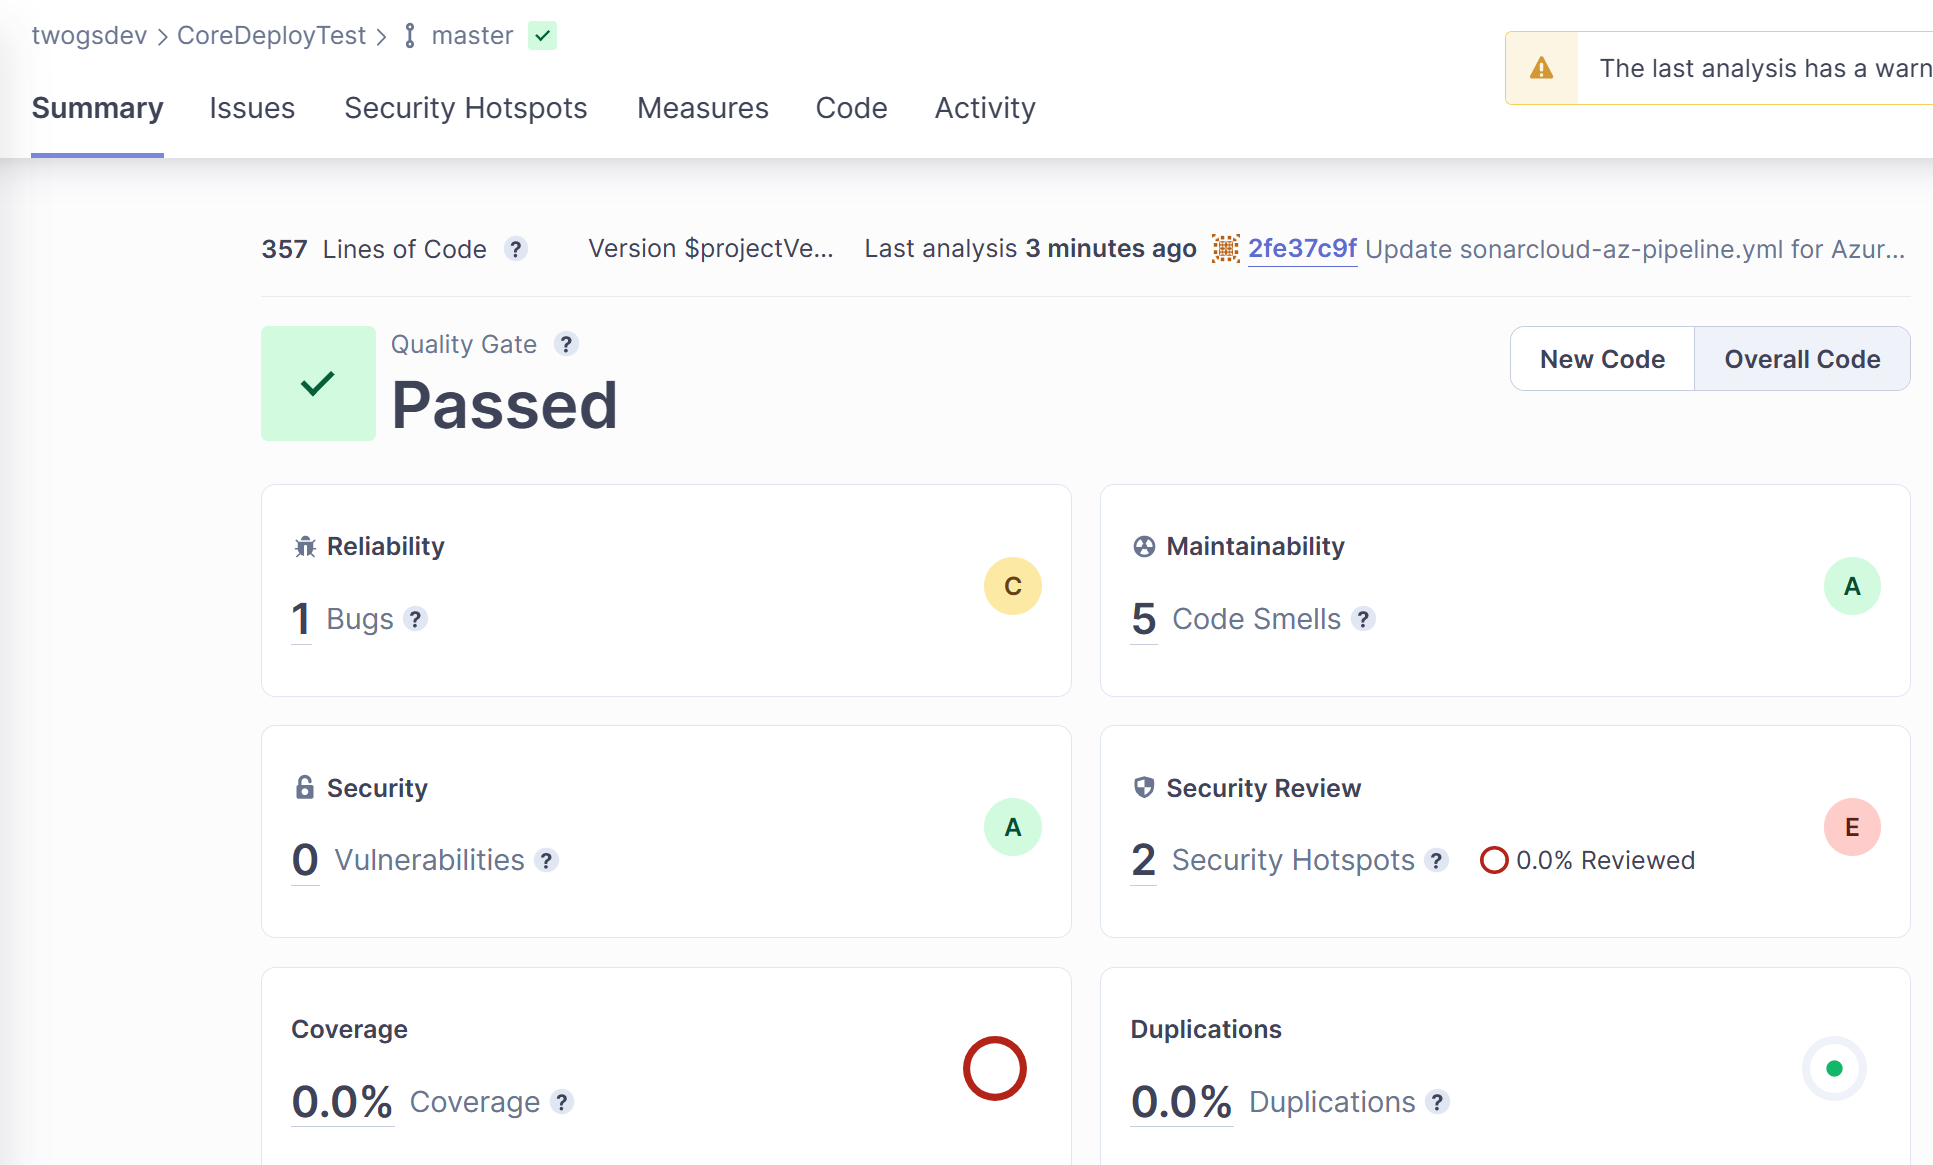
The details of the Bug will be opened.
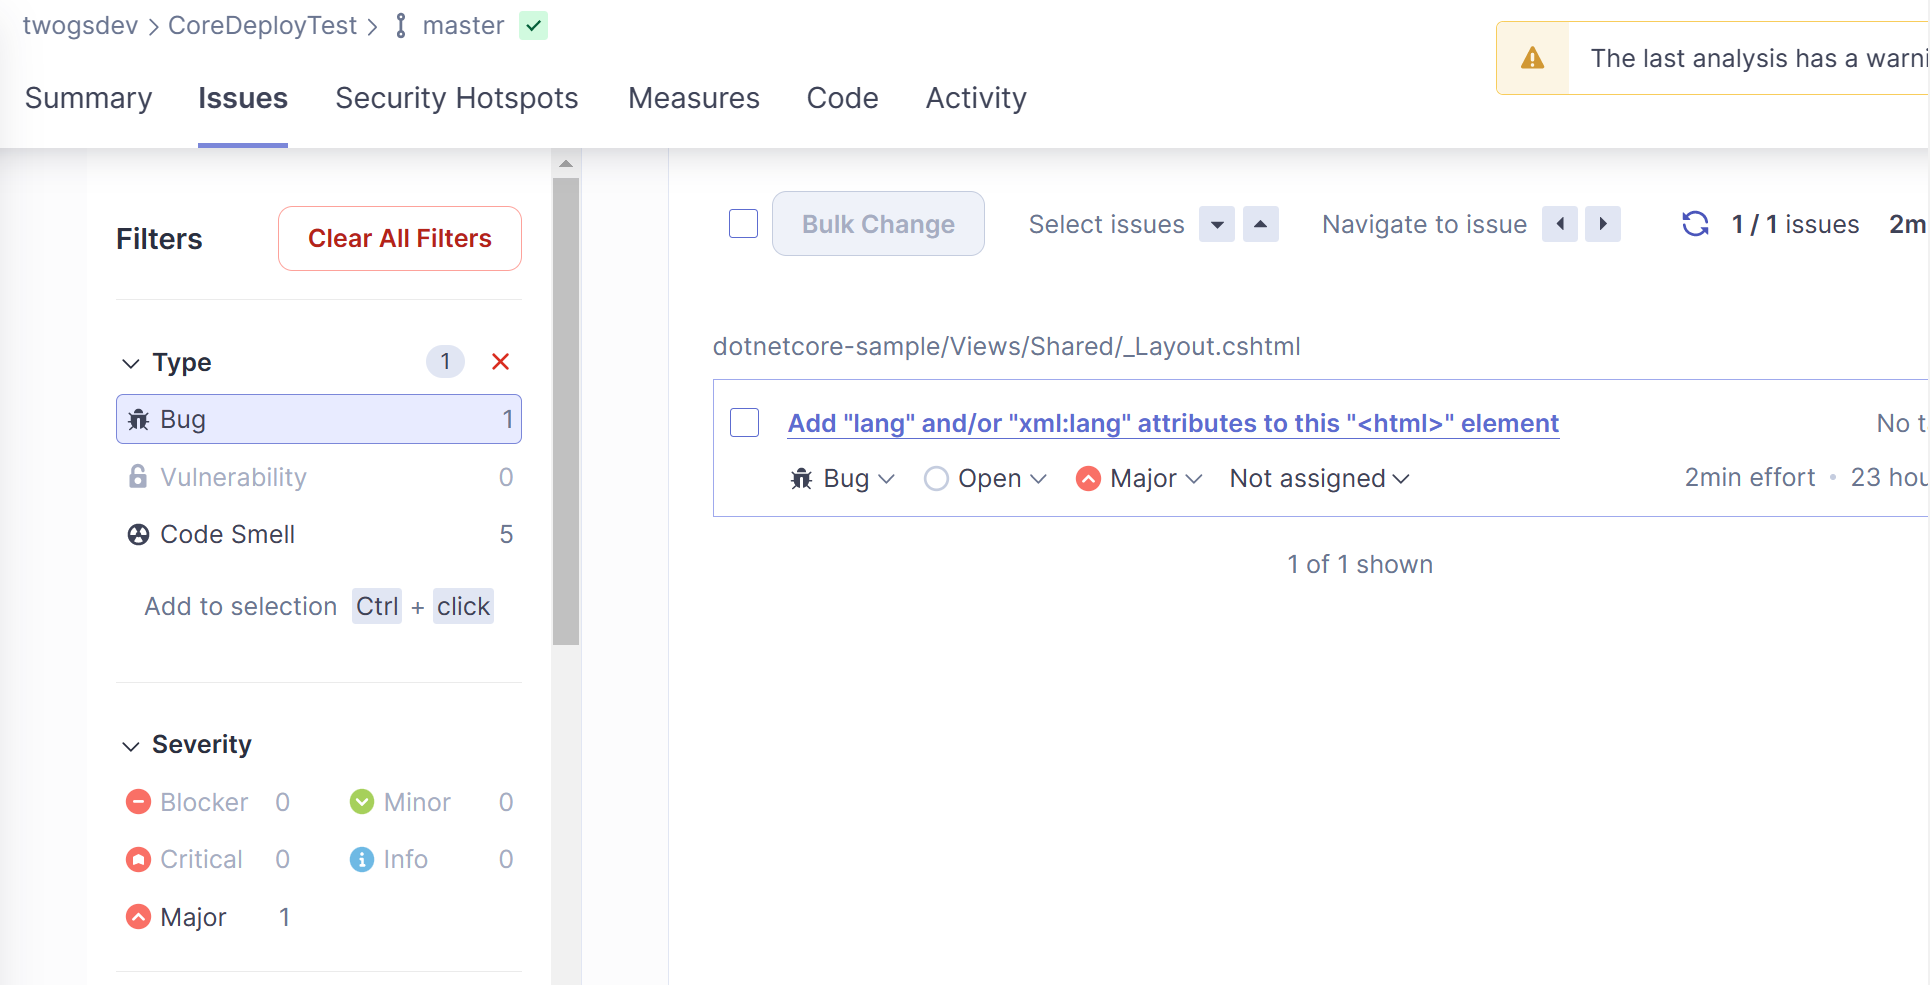
Select the Bug to see the code.
Got a comment?
All my articles are written and managed as Markdown files on GitHub.
Please add an issue or submit a pull request if something is not right on this article or you have a comment.
If you'd like to simply say "thanks", then please send me a so the rest of Twitter can see how awesome my work is.